Advanced Gauge Lighting Instructions
by Toby Erkson
This particular document is for the more advanced mechanic. I do not suggest these procedures be performed by those who are unsure about their abilities or have little experience working on cars or delicate instrumentation. This information is presented to assist those who are contemplating or will be making changes to their gauge cluster.
I was very tentative about diving into my cluster but it turned out to be somewhat easier than I expected (good German engineering helped, I'm sure  ). This was performed on my original '95 gauge cluster; I now am using a 2000 Cabriolet gauge cluster so this modification is not necessary with them. Good luck if you decide to dive in and make changes. Remember to be careful because the parts are easily bent or broken and to be particularly careful about static electricity! Also, you cannot buy individual components should you break something. If you damage any part of the gauge cluster or the components within you would have to buy a new unit. Depending on what was broken you may be able to replace it with a part salvaged from another cluster but that is beyond this document, requiring the skill and experience of a seasoned mechanic (be it amateur or professional).
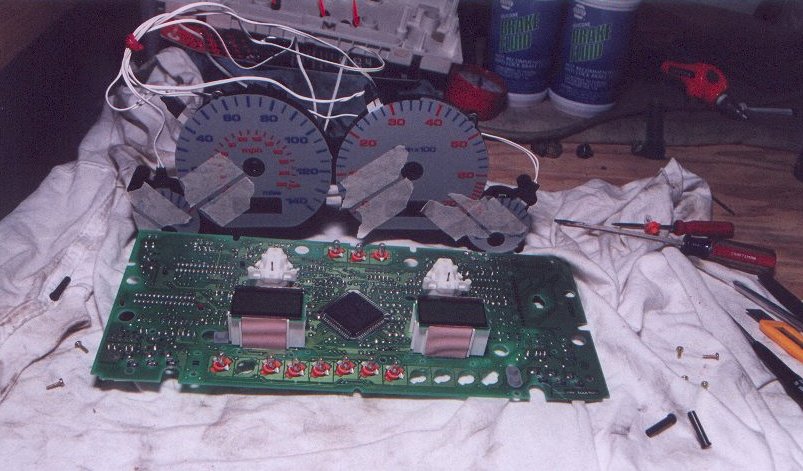
It is assumed that the gauge cluster has already been removed, the white plastic covering the back side has been removed (thus exposing the PC board), and the gauge needles are exposed.
Border the needles with masking tape by placing the tape on the gauge face as shown below. This will allow you to put the needles back in their proper home position.
Place a piece of thin cardboard or several folds of cloth over the top of the gauge that you wish to remove the needle from. Place two thin pieces of metal (I used butter knives) under the round base of the needle with the tips of the metal (or knives) resting on the cardboard/cloth. Slowly lift the strips up to pull the needle from its spindle.
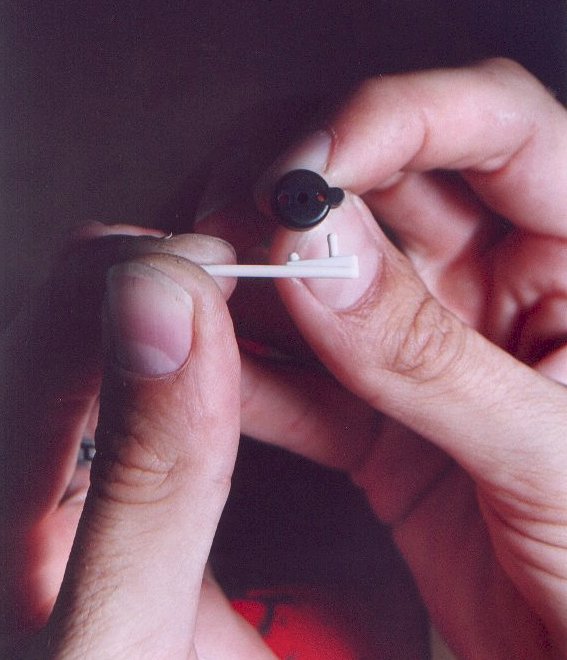
Take the needle and rest it in a vice so the needle face is resting down between the jaws. Using a pointed (but not sharp) tool, you will GENTLY tap the needle from its base by pressing out the two retaining pegs. See the below two pictures for illustration.

Wash your hands or wear nitrile gloves while prepping the needles for paint because any contaminates will mess up the paint. Clean the needles, buff with 0 or 00 steel wool or 400-grit sandpaper, and clean the needles again to remove dust and residue. The needles can be pushed into a piece of cardboard, supported by their two retaining pegs. Try to keep the needle from touching the cardboard so no paint will build-up on their edges.
Give the needles an even and thin coat of WHITE PRIMER. Trust me, black or grey primer makes for a terrible base coat when a day-glo (fluorescent) paint is sprayed on top! The primer is a necessary step because the day-glo paint will not stick to the bare plastic needles. Once the primer is dry, spray the needles with day-glo paint. The primer and day-glo paint can be easily found at any hardware store. I used three thin coats of "Rust-Oleum Fluorescent" red and the results look amazing. VERY IMPORTANT: Let the needles dry completely before handling! Try to handle the needles by the retaining pegs only as much as you can. 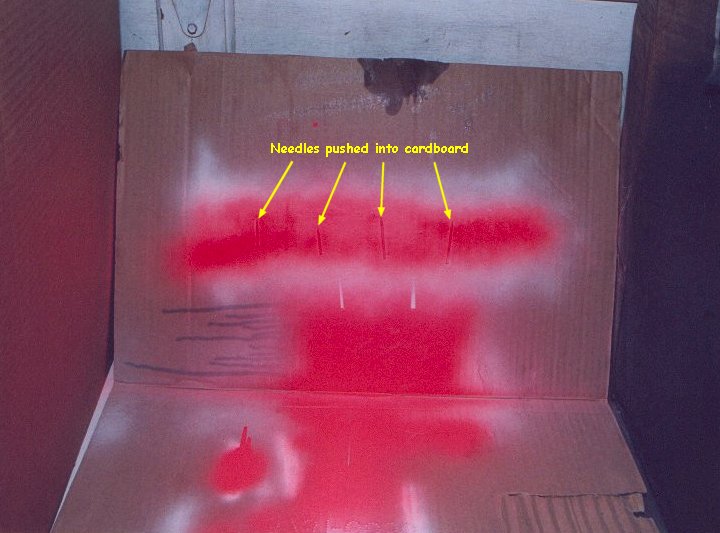
Once the needles are completely dry you can press them back into their hubs. I found that I needed to carefully remove JUST A LITTLE material from the end of the pegs so they would squeeze back into their hub. If you goof and the needle is too loose in its hub you can always glue the retaining pegs on the inside of the hub...but you won't be able to remove the needle again so don't make any mistakes!
<Next page>