Reverse Indiglo Gauge Face Installation Instructions
by Toby Erkson
It is recommended that you have a Bentley shop manual as a reference during this procedure.
Remember, the compass directions of the car are always in relation to the centerline of the car with someone sitting in it. Thus, FRONT is where the headlights are, REAR is where the exhaust tips are, LEFT is the driver side of a USA car, and RIGHT would be the passenger side of a USA car. For those who know boats, LEFT is still PORT and RIGHT is still STARBOARD. This is important to understand as a standard because you may end up facing the rear of the car, thus your left & right will not be the same as the car's left & right :-)
These instructions are based upon the installation of the Reverse Indiglo gauge faces in my 1995 Jetta III GL OBD I car. This document is meant for someone who is comfortable and skilled to work on their own car and around wires, voltmeters and crimp-on style wire connectors. As always, it is best to read this entire document, test fit and 'eye-ball' everything so there will not be any surprises during the installation. The abbreviation "RI" will be used for "Reverse Indiglo" when refering to the gauges.
Note: I bought them in a group buy and somebody else was in charge of it. All I know is that they were bought on eBay -- try doing a search there and see what comes up. Sorry 
What the parts look like:

1. Removing the gauge cluster.
Disconnect the negative battery cable.
Adjust the steering wheel height to the lowest position.
Remove the dash trim piece that is located to the left of the headlight switch. All the dash trim pieces easily pry out with a flat bladed screwdriver unless noted otherwise. For my Jetta this piece was the airbag warning light and the wiring harness needed to be unplugged. Other vehicles may only have a simple trim piece (airbag light would be located in the gauge cluster).
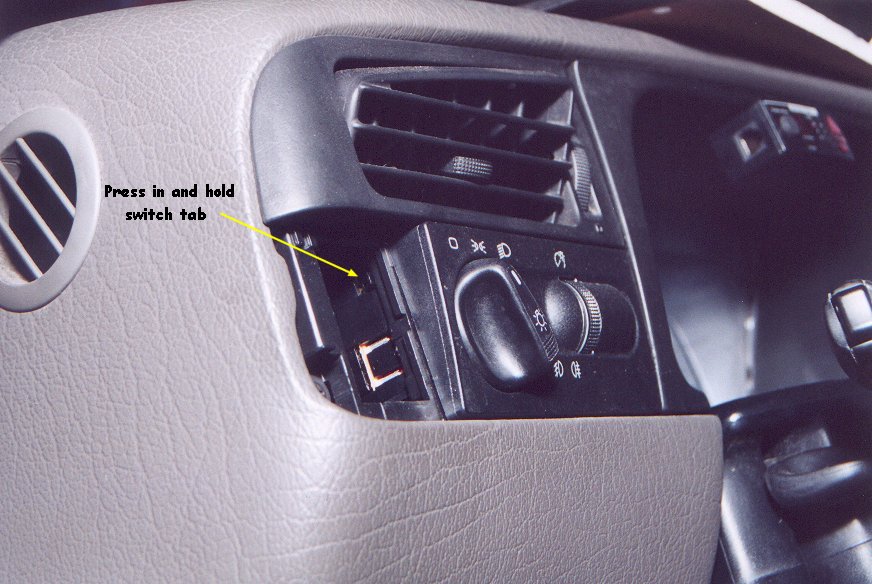
To remove the headlight switch, press in and hold the tab on the left side and then pull the switch out. The wiring harness attached to it may be short so the switch will only come out an inch or two. Reach behind the switch and press on the outside tab locks on the wiring harness plug and remove the plug from the switch.
Remove the dash trim piece located at the lower right side of the gauge cluster, just below the left center vent. Now the two retaining screws that hold the gauge trim can be removed.

Now the gauge trim can be pulled towards you, then tilted up and removed.

<Next page>