Adjusting the valves on a 914 with the engine in the car is, to me, a pain in the butt. Compared to the valve adjustment of a VW air-cooled engine, the 914 valve adjustment requires a few extra steps. This How-To is an addendum to other resources that show how to adjust the 914/4 valves, like a factory shop manual or the Haynes shop manual -- either of which the home mechanic MUST have if they plan on doing any kind of work themselves.
My first 914 adjustment was aggravating because it wasn't as easy as my VW Squareback. The exhaust/heat exchangers and suspension mounts cramped the working space, even for my skinny hands. Getting to the front valves (#2 & #4) wasn't possible with just the valve cover removed...oh, how does one get the valve cover off in the first place? Does the bail go up or down, and what do you use to move it? And boy is it dirty under there!
Okay, before we start, let's set some ground rules about this document:
- This is not a complete How-To on adjusting the valves. It is assumed you already know how to do this (if you've done an air-cooled VW, for example, you're ready) or are comfortable doing it.
- This document is just to give the first-timer a helping-hand in starting the valve adjustment procedure because it may not be obvious how to prepare the car in order for you to get your hands and feeler gauge in there.
- It is assumed that you are using a shop manual that will guide you in getting the engine's #1 piston to
TDC, the layout of the engine (because the flywheel faces rearward) as well as the proper valve clearances.
Okay, let's begin...
Prepare the car
First, remove the engine lid. This will allow you to easily maneuver in the engine compartment. Using a 10mm socket, simply loosen the two bolts that hold the engine lid hinges and slide the lid rearward and carefully set aside. Put the car into 5th gear (you'll find out why later on). Raise the car upward with whatever method you are using (lift, jackstands, ramps, etc.). Because I didn't want any engine oil dripping out of the valve area, I set the car on four jackstand so it was level. One jackstand under each "doughnut" at the four corners of the pan. I use a creeper to move around under the car.
Put cylinder #1 in TDC
Move the #1 piston to TDC. In a nutshell, the rotor should be pointing to the thin notch in the distributor body; this indicates the firing position for the #1 cylinder. Looking into the timing port at the fan, I had the number zero on the fan showing in the notch in the fan housing, indicating my 2.0L motor was at TDC. Check your shop manual for your particular engine.
Connection pipe prep
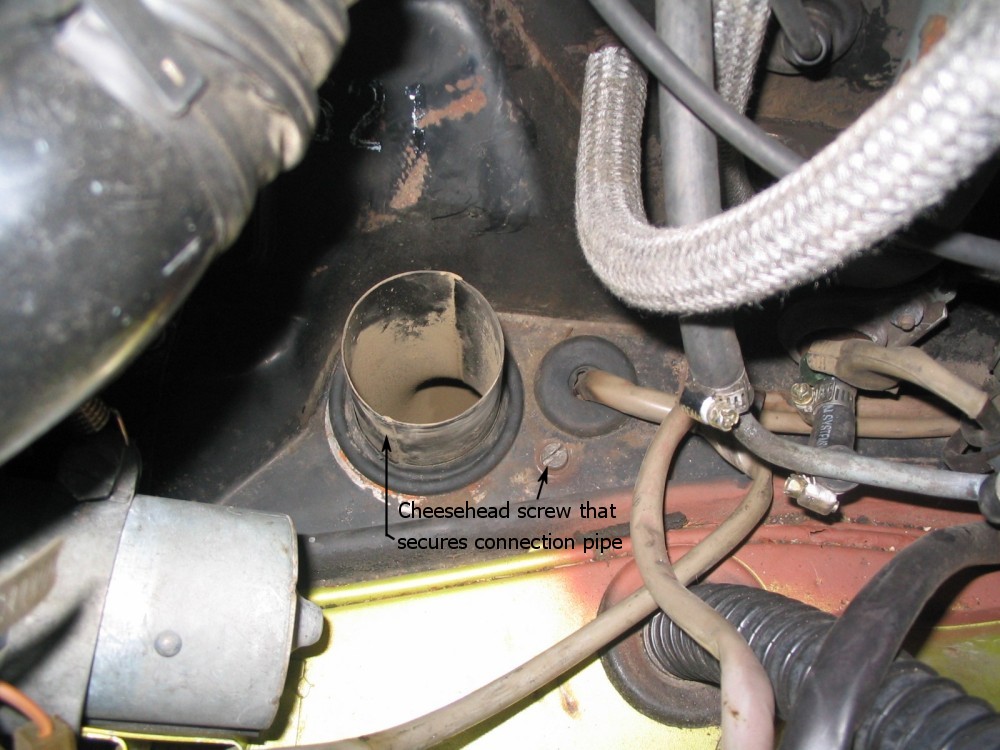
From the engine bay, remove both fresh air heater hoses from their respective connection pipes and push them aside. Unscrew the cheesehead screw on each side as it holds the connection pipe to the engine tin. The picture below is of the left side.
Remove the warm air elbows
Get underneath the car. Remove the cheesehead screws from the top and bottom of the warm air elbow. As a personal note, I would recommend replacing the top cheesehead screw with a stainless steel bolt and washer (M6 x 1.00) as it will make removal next time much easier with a 10mm wrench 
Loosen the bolt that holds the heater control box to the warm air elbow.
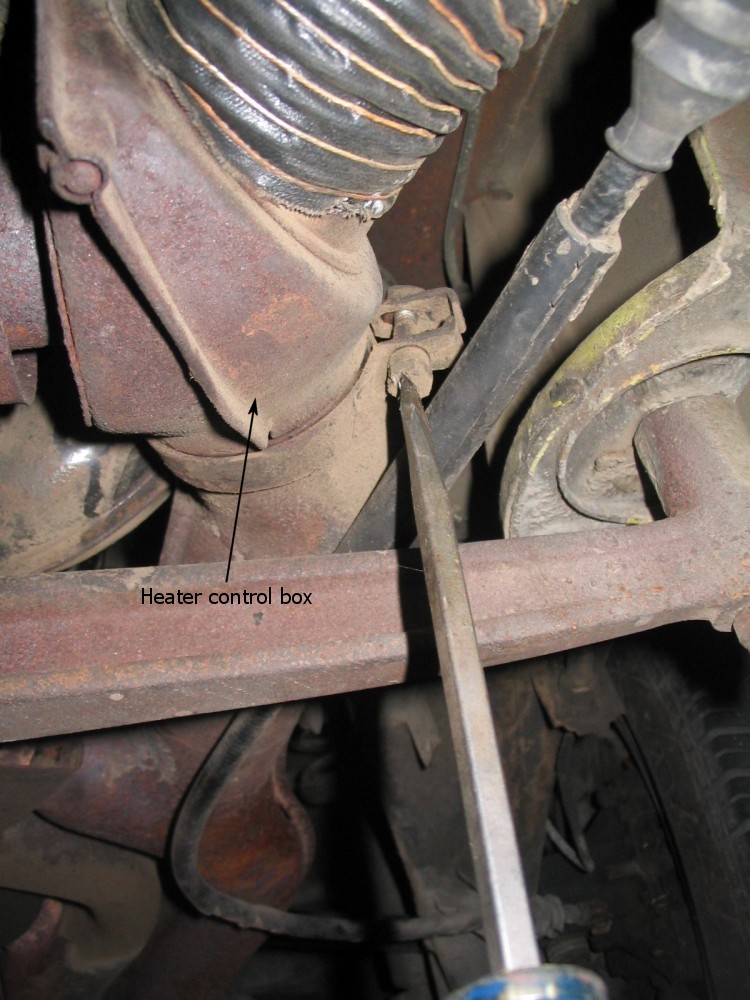
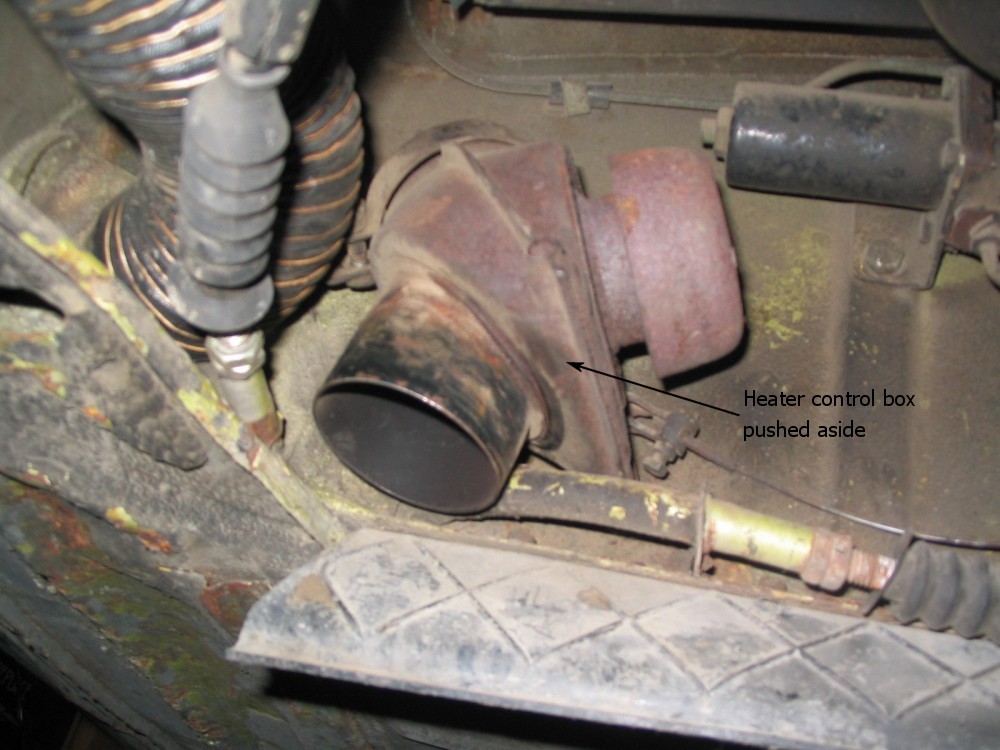
Remove the flexible hose from the heater control box and push aside. Remove the warm air elbow and tuck the heater control box against the firewall.
Remove the connection pipes
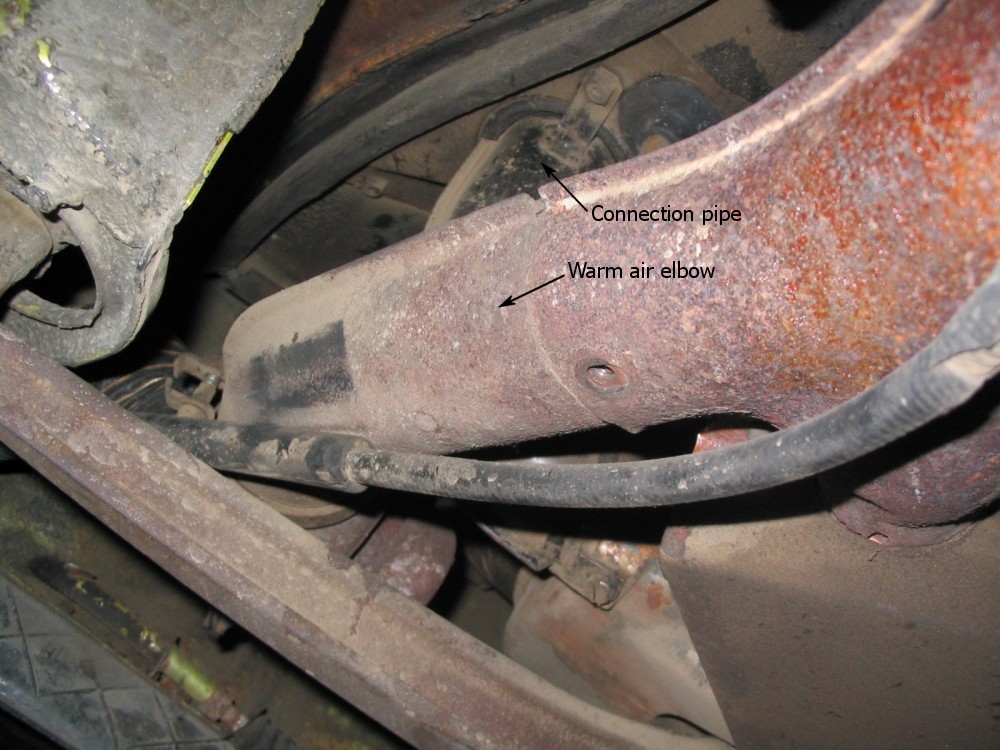
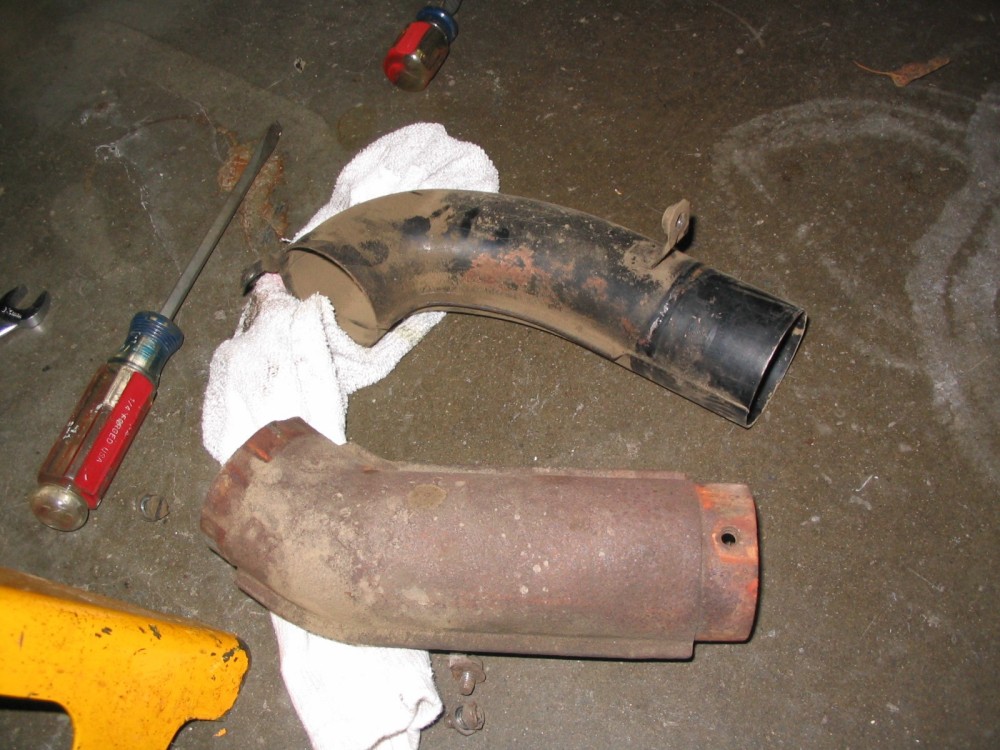
Remove the cheesehead screw that holds the connection pipe to the heating air supply piping -- a Y-shaped tubing that connects to the heat exchanger -- and then remove the connection pipe. Pictured below is the connection pipe (top pipe) and warm air elbow (bottom pipe).
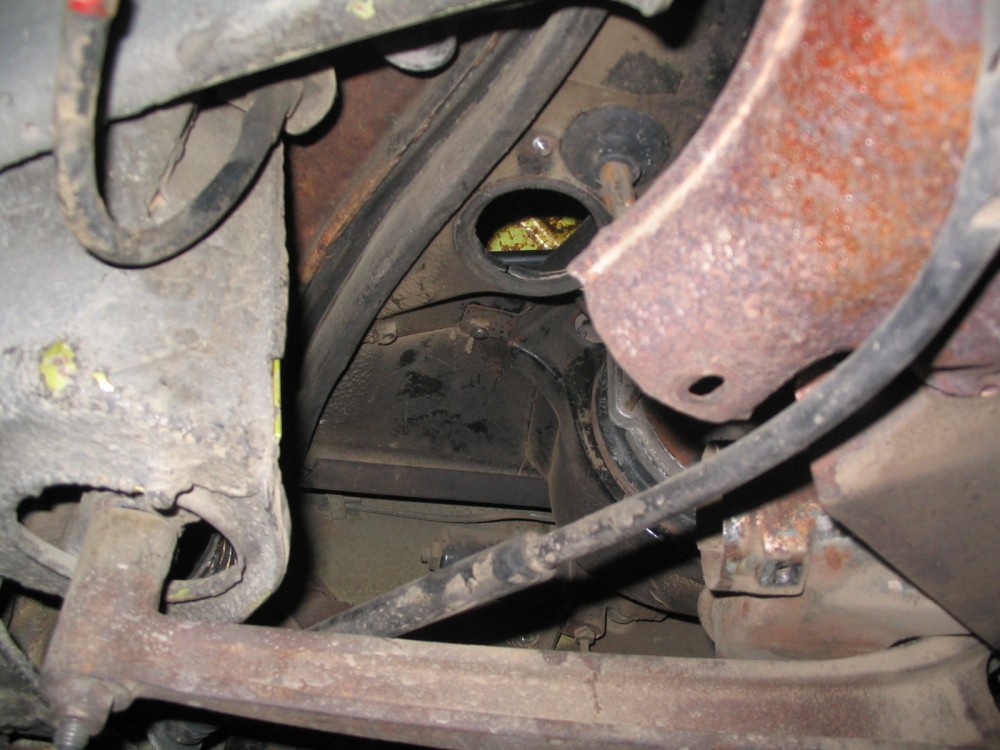
Looking forward, this shows the area opened up with the two pipes removed. This is the area where you'll be when working on the forward cylinders (#2 & #4).
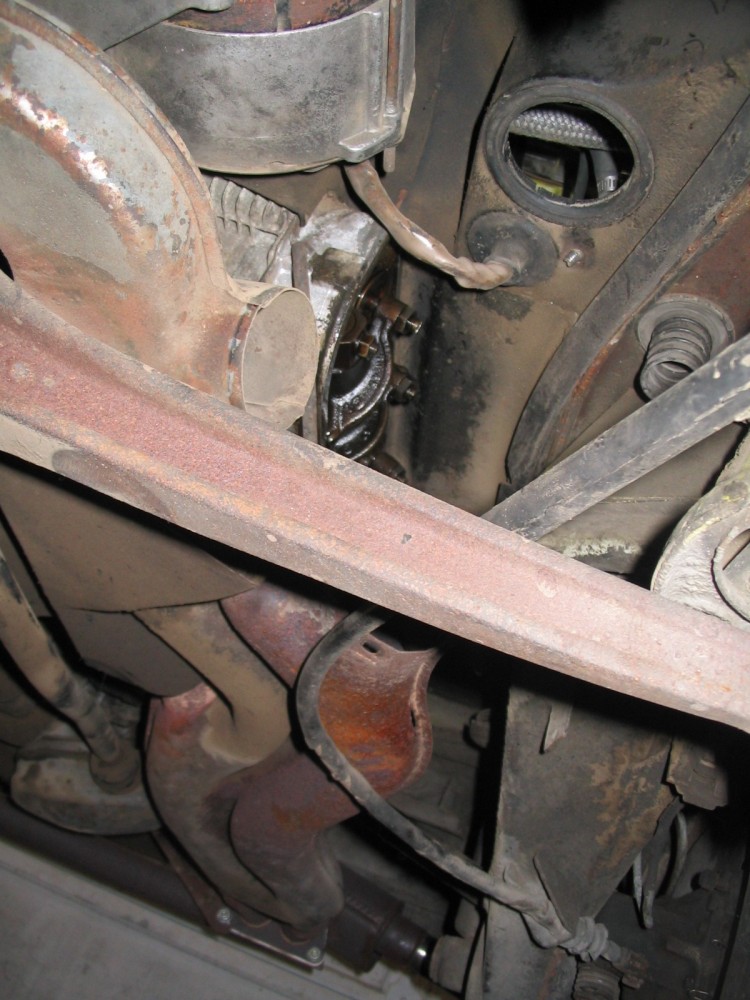
Here's the same area but looking rearward. Valve cover removed so you can see the #2 rocker arms.
Remove the valve covers
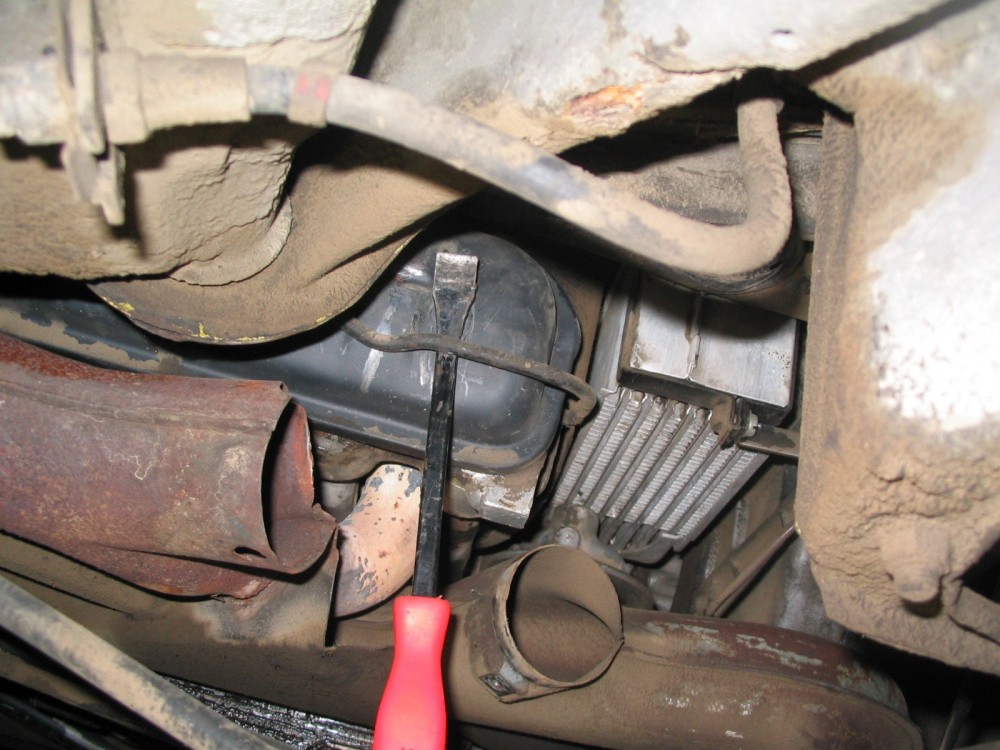
This is the right side of the engine (notice oil cooler). I'm using a small pry bar to unclip the bail from the valve cover and walk it downward. Someone suggested using a rag to pull the bail down so that is a good method as well, especially in such tight quarters and if you don't want to mark up your valve cover as much. Once the bail is free from the valve cover, simply pop off the cover and remove it by slowly moving it forward until it clears the heat exchanger...or...rearward, above and past the rear axle, before dropping it down. You want to move slowly so you don't brush against anything and have dirt/dust get into the valve cover and valve train.
Adjusting the valves the EASY way!
Look for the small opening where the transaxle meets the engine. While the engine is still on #1 TDC, make a mark on the flywheel that's visible in the hole. My flywheel already had a couple small dimples punched into the flywheel, like someone used a carbide pointer and tapped it into the flywheel. This is your indication that the #1 or #3 cylinder is in the TDC position, depending where your rotor is pointing (at #1 or #3 firing position). Remember, the distributor rotor will turn 90° for every 180° the flywheel turns.
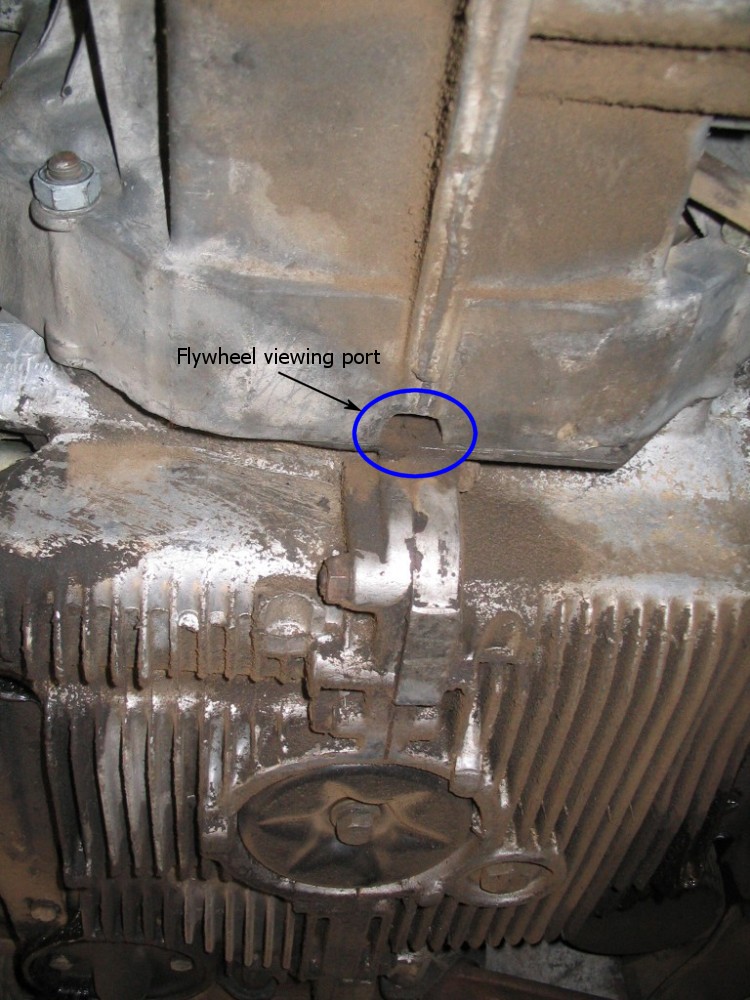
The shop manuals have you adjust each cylinder (intake and exhaust) individually. This is fine but requires you to get out from under the car and check the position of the rotor and/or markings on the fan each time and then get back under the car. Well, I'm going to explain to you a faster method as told to me by a certified VW dealership mechanic. Since the #1 cylinder is already at TDC, go ahead and adjust it's valves. While you're under the car, also adjust the #2 intake and #4 exhaust
Now here's why I had you put the car in 5th gear: Grab the rear wheels and rotate both of them (or hold one and rotate the other) as if the car was rolling forward. You may need to brace yourself a little bit but this method makes it really easy to turn the engine. Looking up into the flywheel viewing port, you'll see the flywheel rotate counter-clockwise, or from the viewing port perspective, from left to right. Stop when the flywheel has made an entire 360° revolution. This is why you made a mark on the flywheel, so you know when you've rotated it a full revolution. If you were to get out from under the car and look at your rotor, it would be pointing at the #3 firing position (which is 180° from the #1 firing position). Now, on my flywheel I have a V-notch at the 180° position so I could adjust the valves for each cylinder the "traditional" way if I wanted to (but that would take just a tad longer).
You can now adjust the valves for the #3 cylinder as well as the #4 intake and the #2 exhaust. Done! All valves are now adjusted 
Okay, here's a handly little reference you can use on any air-cooled VW engine (I use the same method on my VW Squareback):
| #1 cylinder @TDC |
#1 intake & exhaust |
#2 intake |
#4 exhaust |
| #3 cylinder @TDC |
#3 intake & exhaust |
#2 exhaust |
#4 intake |
Now that the valves are adjusted, wipe down the inside of the valve covers (remove dirt), replace the gaskets if you need to, wipe clean the valve cover gasket mating surfaces on the heads, put the valve covers back on the heads, and push the valve cover bails back up the valve covers until they snap into place. I recommend you put the rotor cap back on the distributor and start the engine up, let it idle, and check for oil leaks past the valve covers. If all is well then turn the engine off and continue on, otherwise fix the oil leaks. Put the connection pipes back on, followed by the warm air elbows and heater control boxes. Lower the car, screw the timing cover back into the fan housing, and re-install the engine lid. You are finished!
-- End of Document --