 Most viewed - Misc Most viewed - Misc |
438 views
|
|

438 views
|
|

437 views
|
|

436 views
|
|
433 views
|
|

427 views
|
|
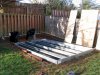
426 viewsThe builders setting up the galvanized floor framing. I messed up :-( The site wasn't exactly square and I should've expanded the width an additional 3" for a total of 6" per side, left and right, to give a little more spacing between the shed and site walls. But the guys said it's no big deal and, overall, I did a really good job.
|
|

426 views
|
|

425 views
|
|

423 views
|
|
422 viewsWhat we used. Found it at Lowes.
|
|

418 views
|
|
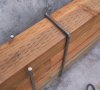
417 viewsFinished. This process took me 4.5 hours to complete but was well worth it. Now the 4"x4" pressure treated lumber is locked into position.
|
|
416 views
|
|

416 views
|
|
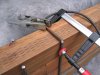
415 viewsClamp pins close together, place top of "staple" into position, and weld the pieces together.
|
|

414 views
|
|

414 views
|
|
414 views
|
|

413 views
|
|
| 590 files on 30 page(s) |
2 |  |
|
|





