Last updated albums - How-to Last updated albums - How-to |

Motorcycle tire vise upgrade334 viewsHere is my Sport Classic in the new Derek Weaver vise.
I kept the original wheel stop because it is in a stronger mounting location. Using the supplied DW wheel stop would require mounting it on the vertical strip just under the lift bed. That is welded on and could possibly bend if struck too hard when rolling the bike against it. It would also require drilling two more holes...meh, why bother?
https://www.derekweaver.com/bikers-garage/motorcycle-lift-parts-accessories/w-vise-motorcycle-vise-tire-clamp/
Jun 17, 2017
|
|

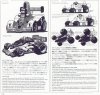
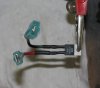
Apache lift box repair583 viewsCloser-up. Exploded view. Notice pin is short...it came to us broken.Oct 19, 2014
|
|

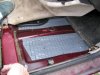
Jetta side mirror replacement319 viewsWhat the interior looks like. I set the mirror so it was centered in the housing. I started at the 11 o'clock position and worked my way anti-clockwise (aka counter-clockwise), gently prying the mirror clips away from the ring mount.Aug 13, 2013
|
|

Routan LED eyebrows680 viewsTa-da!Apr 16, 2012
|
|

Routan fog install670 viewsRight fog light installed, front view. Note that adjusting screw is always at the top.Apr 03, 2012
|
|

Goldwing turn signal lube336 viewsWhen attaching the switch housing make sure to line up the housing pin to the hole in the handle bar.Jan 17, 2011
|
|

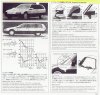
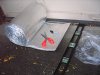
Jetta Halogen90003 to HID Bi-Xenon410 viewsThe far left box shows plastic removed for the HID wires and the 3-prong plug that normally goes on the halogen bulb. Make the left [driver] side slightly bigger to accommodate all wires. Should be snug! Center box shows how bulb retaining hook is moved to under the frame and the far right box shows how the retaining wire is positioned to hold the HID bulb in. It will require a slight bending of the wire but not too much because you don't want to break the spring steel!! Dec 05, 2010
|
|

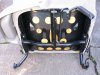
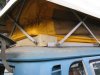
Bus middle seat retrofit315 views2-person seat installed, yeay!!Feb 06, 2010
|
|