 Last additions Last additions |
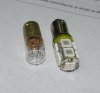
438 viewsClose-up comparison of the incandescent bulb (left) and the LED replacement (right).Feb 23, 2011
|
|

410 viewsThe stock incandescent bulb. Boooo!Feb 23, 2011
|
|
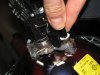
428 viewsThe parking lamp simply pulls straight out. It's a friction-fit retention assembly.Feb 23, 2011
|
|
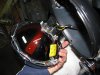
441 viewsThe headlamp exposed. Pretty darn simple in there.Feb 23, 2011
|
|
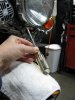
456 viewsUse a Phillips screwdriver to remove the retaining screw at the bottom of the headlamp. No need to completely remove the screw, just until it becomes loose & wobbly.Feb 23, 2011
|
|
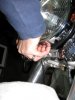
Fingernails help here.430 viewsPut your fingers between the headlamp bucket and the chrome headlamp ring and pull the bottom of the headlamp out. It only needs to travel a centimeter or two for it to be free. Unhook the top and carefully lay the headlamp on the fluffy towel you placed on the fender (that's a hint).Feb 23, 2011
|
|

391 viewsFeb 19, 2011
|
|
380 viewsFeb 19, 2011
|
|

388 viewsRight side, back view.Feb 19, 2011
|
|

373 viewsDamn she's a fine looking ride! Protectors mounted.Feb 19, 2011
|
|
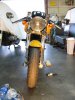
360 viewsThis shows my bike with one protector on. The left side of the picture (right side of bike) is no protector while the right side of the picture (left side of bike) has the fork protector mounted.Feb 19, 2011
|
|
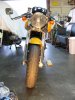
337 viewsBoth protectors mounted.Feb 19, 2011
|
|

371 viewsShowing the gap between the protector and the monoposto fender.Feb 19, 2011
|
|
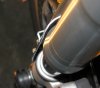
364 viewsShowing the gap between the protector and the upper fork. Since the wheel assembly moves up and down a gap is needed so the protector won't scrape against the fork.Feb 19, 2011
|
|
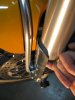
375 viewsFeb 19, 2011
|
|

381 viewsFollowing the supplied instructions, using a finger to hold the protector in place and keep it spaced between the upper fork and, in the case of the monoposto, the fender. Tighten the bolts.Feb 19, 2011
|
|
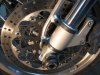
413 viewsRemove the two bolts that hold the fender bracket, using a 4mm Allen wrench.Feb 19, 2011
|
|
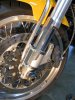
374 viewsPut the guard in position, put a drop of blue Lok-tite on the bolts, and tighten them up to the point of barely touching the protector.Feb 19, 2011
|
|
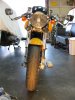
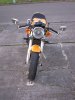
365 viewsHere's my bike, before installing the fork protectors.Feb 19, 2011
|
|

463 viewsHere's what they look like. A simple and effective design. Here's where you can get 'em:
http://www.bhpbikeparts.co.uk/content/products/Feb 19, 2011
|
|
| 3332 files on 167 page(s) |
 |
32 | |
|





