 Last additions - Type 3 Last additions - Type 3 |
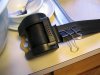
666 viewsTake your 'new' belts and clean them. Do this by pulling out the belt and securing it with something to keep it from retracting.Oct 16, 2005
|
|
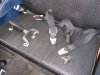
622 viewsThe ugly stock belts and latches are removed.Oct 16, 2005
|
|
661 viewsThe last time I'll see this mess!Oct 16, 2005
|
|

595 viewsAll stretched out and ready for a bath. Scrub both sides gently in hot, soapy water. Rinse both sides in fresh, hot water.Oct 16, 2005
|
|

597 viewsJust a reference of how the upper mount should look when the new one goes in.Oct 16, 2005
|
|

594 viewsDrying in the sun shine.Oct 16, 2005
|
|
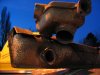
376 viewsJust a pretty picture of the muffler and the car it belongs to :-)Oct 16, 2005
|
|

440 viewsFlange on lower heat exchanger.Oct 16, 2005
|
|

397 viewsOct 16, 2005
|
|

450 viewsCracked heat shield welded up.Oct 16, 2005
|
|

430 viewsAdded flanges to lower muffler-to-heat-exchanger pipes. Was previously "fixed" by welding the muffler to the exchanger. Thin metal sections strengthened where needed (holey) and tack welds added to keep parts from loosening.Oct 16, 2005
|
|

346 viewsOct 16, 2005
|
|

373 viewsOct 16, 2005
|
|

392 viewsOct 16, 2005
|
|

374 viewsTake the very top cover off and this is what lies below.Oct 16, 2005
|
|

339 viewsOct 16, 2005
|
|

378 viewsBad picture of how the flap stop goes back in. Pieces curve away from each other.Oct 16, 2005
|
|

363 viewsInternal fuel filter positioning.Oct 16, 2005
|
|

353 viewsTake the middle section off and we see this.Oct 16, 2005
|
|
397 viewsOct 16, 2005
|
|
| 482 files on 25 page(s) |
 |
21 | |
|





