 Last additions - Type 3 Last additions - Type 3 |

428 viewsDetail of the pivot assembly. Has a Zerk fitting so the pivot can be lubricated. Nice!Apr 02, 2007
|
|

365 viewsThe top wooden box comes off the lower metal box. The wooden box has a door and the lower box has a drop-down tailgate.Apr 02, 2007
|
|

410 viewsClose-up of the single-to-double hitch the previous owner made. I had to use a 1.25" to 2" adapter to pull it behind my Jetta. Was a little squirly even though I went no faster than 60mph. Definitely will be stable once I make a real hitch for my Squareback.Apr 02, 2007
|
|
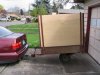
02Apr2007 -- Made it home.420 viewsTrailer parked at home.Apr 02, 2007
|
|

377 viewsMy seat is all the way back and I have about six inches of space between my shin and the back of the parcel tray.Mar 09, 2007
|
|

395 viewsLooking underneath at how it stays in: Four pointed screws push into the carpeting and, if really snugged tight, into the skin of the car. This is the front right corner and there's a screw at each corner. Thus the parcel tray is basically held in via expansion...it's pushes on the sides of the cabin wall.Mar 09, 2007
|
|

370 views"Capogrosso" sticker on the front metal trim of the parcel tray.Mar 09, 2007
|
|

412 viewsFor these pictures I don't have the back-splash inserted in the retaining clips but this shows how it's used to keep items from falling out the front of the parcel tray (remember, front of car is front).Mar 09, 2007
|
|

368 viewsDetail of one of the mounting screws.Mar 09, 2007
|
|

403 viewsLooking down at the driver's side.Mar 09, 2007
|
|
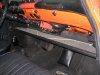
403 viewsInstalled and what it is. Simply a tray that installs under the dash. My particular model uses a synthetic webbing inside the frame. Rubber trim surrounds the metal frame on the front and sides while the back is black metal trim.Mar 09, 2007
|
|

378 viewsHow the parcel tray looks out of the car but with the back-splash clipped in.Mar 09, 2007
|
|
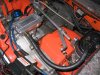
583 viewsHow my case breather is being used. Only one line from the breather and it dumps case over-pressure into the top of the carb.Jan 03, 2007
|
|
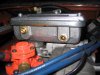
503 viewsClose-up of the left side of the breather.Jan 03, 2007
|
|
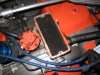
515 viewsTop removed exposing the foam sponge that traps the oil vapor.Jan 03, 2007
|
|
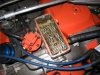
499 viewsWith the foam removed you can see the expanded metal mesh it rests on. The forward holes are above the mesh while the rear holes are below it.Jan 03, 2007
|
|
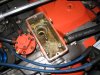
524 viewsMesh removed, exposing the inside of the breather. Nothing fancy.Jan 03, 2007
|
|
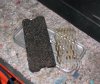
418 viewsClose-up of the foam and mesh. Again, nothing fancy. These are the original items.Jan 03, 2007
|
|
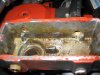
467 viewsClose-up of the inside. The bottom edge of the vent is about 5mm from the bottom of the breather.Jan 03, 2007
|
|
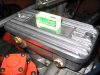
478 viewsSpirit-level on breather to show that it (along with my engine) is at a slight angle. Thus, oil will drain back down into the case through the breather stand (the tower the breather is bolted to).Jan 03, 2007
|
|
| 482 files on 25 page(s) |
 |
9 | |
|





