 Last additions - Zoom-zoom Last additions - Zoom-zoom |
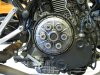
594 viewsThe original OEM clutch.Aug 05, 2013
|
|
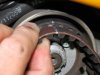
481 viewsAt the top pulley you mark the replacement belt perfectly with the mark on the old belt. You can now remove the vertical belt and quickly replace it with the new belt, followed by the horizontal belt. Adjust the belt tension and then go ride!Jul 28, 2013
|
|
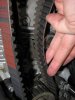
482 viewsBecause the teeth line up on the center pulley you can place the replacement belt right next to the old belt, lining up the belts tooth to tooth. No need for counting!Jul 28, 2013
|
|
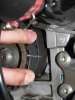
493 viewsWith the horizontal (front) cylinder belt removed I lined up my replacement belt for the vertical cylinder and marked it.Jul 28, 2013
|
|
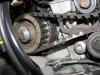
500 viewsFor the inner belt that runs the vertical (rear) cylinder I made my own mark on the belt and pulley at about the center spot.Jul 28, 2013
|
|
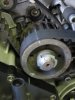
538 viewsLine up the pulley markings with those on the engine case. I used a white grease pencil (china marker) to mark the points on both the case and pulleys for faster visual confirmation. You can see here I drew a line all of the way across the horizontal belt and center pulley as a precaution. I marked the replacement (new) horizontal belt the same way as the vertical belt explained here.Jul 28, 2013
|
|
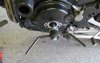
473 viewsThe turning tool screws in snugly and easily lets you rotate then engine to get the pulleys to TDC (Top Dead Center).Jul 28, 2013
|
|
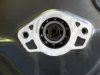
461 viewsRemove the center cover on the left side to expose the end of the crank. This is what you'll see.Jul 28, 2013
|
|

Done!511 viewsDec 27, 2012
|
|

516 viewsI used the top of the hole in the bolt where the Allen wrench entered.Dec 27, 2012
|
|

450 viewsThere's a indentation in the seat pan that my tape measure consistently fit nicely in.Dec 27, 2012
|
|

501 viewsLower bolt. Use a 10mm Allen wrench to remove the bolts. Though they already have molyb (grease B using Ducati nomenclature) smeared on them I (later) added a little bit more.Dec 27, 2012
|
|

508 viewsI used my engine hoist to lift my bike by the frame. I'm so glad I have this! This was necessary to get the full extension sag measurement as well as lifting the bike to take pressure off the lower bolt so it could be removed.Dec 27, 2012
|
|

Detail 3458 viewsThe Ohlins shock (left) has an adjustable lower mount as seen by the blue locking nut and threads.Dec 27, 2012
|
|
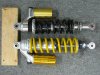
Detail 1471 viewsOEM Sachs on top (black spring) and Ohlins racing on the bottom (yellow spring).Dec 27, 2012
|
|

Detail 2456 viewsThe Ohlins shock has more threads for more adjust-ability, likely for the range of springs it can accommodate.Dec 27, 2012
|
|

351 viewsStock on left, LED on right. Looking at the Bus from the right rear corner.Sep 20, 2012
|
|

358 viewsStock on left, LED on right. Looking into the back of the Bus.Sep 20, 2012
|
|

346 viewsStock on left, LED on right. Looking into the front of the Bus.Sep 20, 2012
|
|
353 viewsStock on left, LED on right. Front light on only, looking forward.Sep 20, 2012
|
|
| 1529 files on 77 page(s) |
 |
11 | |
|





