 Last additions - Zoom-zoom Last additions - Zoom-zoom |
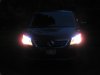
426 viewsLow beams on.Apr 16, 2012
|
|

422 viewsParking lights on.Apr 16, 2012
|
|

426 viewsApr 16, 2012
|
|
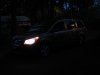
425 viewsWith low beams on. Very visible from the sides.Apr 16, 2012
|
|

425 viewsJust after sunset. At the time I took these pictures it was brighter out than what appears in the images. The LEDs are bright enough to the camera that it used a faster shutter speed, thus making the image look darker than it really is.Apr 16, 2012
|
|
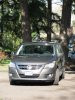
447 viewsFacing into the sun, the LEDs can still be seen although they aren't as bright as dedicated OEM units found on other vehicles.Apr 16, 2012
|
|
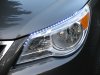
427 viewsIn the shade.Apr 16, 2012
|
|

All done!444 viewsLights on. I took this picture with the flash to dim the LED array as they are very bright.Apr 13, 2012
|
|
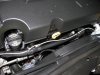
428 viewsRouting the power feed wire along an existing loom.Apr 13, 2012
|
|
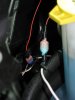
437 viewsThe red wire in the background is the turn signal tap while the white wire in the foreground is the feed to the DRL array.Apr 13, 2012
|
|
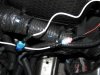
416 viewsJust a close-up of the power feed from the relay box tapped into the main power feed line that goes between the DRL LED array. The connector that's connecting white wire to red wire is what's feeding the DRL LED array.Apr 13, 2012
|
|
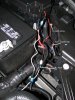
404 viewsShowing the finished wiring.Apr 13, 2012
|
|
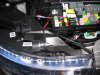
456 viewsJust testing the left DRL LED array directly to the relay box. Used the camera flash to 'dim' the LEDs so they wouldn't wash out the picture. They are so bright that it can be seen that they are on.Apr 13, 2012
|
|
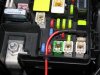
417 viewsFeed the power feed wire through the grommet and crimp on the connector. It should be snug in order to keep moisture and dust out.Apr 13, 2012
|
|
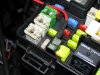
431 viewsThe fuse tab plugged in and with the stock 20A fuse in the BOTTOM. The top fuse will be a 1A to 3A item -- what ever is the smallest I can find -- since the LED array doesn't pull an appreciable amount of current.Apr 13, 2012
|
|
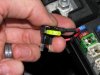
412 viewsStock 20A fuse removed and put in its new home.Apr 13, 2012
|
|
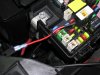
425 viewsWire passed through and new connector crimped on. Fuse tap is ready to replace the M6 20A fuse. I chose this one because it's powered only when the van is on. This fuse is for the #1 ignition switched power plug and rain sensor...our van doesn't have a rain sensor so it's got power to "spare"...heeheehee.Apr 13, 2012
|
|
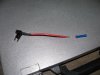
Fuse tap!442 viewsThis is how to easily and safely tap into some power without compromising the stock wiring or running a long lead through the firewall. I cut the bullet connector off so I could pass the wire through the grommet hole and so I could use one of my own spade connectors. To be on the safe side, make sure the fuse tap can handle 25A to 30A minimum. A 10A fuse tap won't work! The bottom slot is for the placing the stock fuse while the top is for the accessory and thus the red wire leading from the fuse tap.Apr 13, 2012
|
|
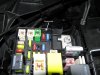
429 viewsGrommet installed. It's low enough that it will not interfere with the closing of the relay box lid. The fuse tap wire is 16 gauge so I used a grommet that had a 5/32" bore and 1/4" x 3/32" groove.Apr 13, 2012
|
|
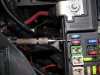
Connecting the DRL LED array.510 viewsI used a hand drill with a 2mm drill bit (smallest I had) to carefully drill a pilot hole into the side of the relay box. The pilot hole is 7mm down from the top of the lip of the fuse/relay box. It's between fuses M20 and M27.Apr 13, 2012
|
|
| 1529 files on 77 page(s) |
 |
14 | |
|





