 Last additions - Zoom-zoom Last additions - Zoom-zoom |

...after.485 viewsThe bottom of the switch is at 36".Jul 03, 2011
|
|

510 viewsNow the bar-end mount is up two inches at 34" high.Jul 03, 2011
|
|
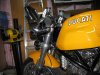
...after.614 viewsJul 03, 2011
|
|
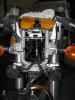
525 viewsThe view of the installed ladder and hi-risers. Headlight goes back on and the gauge cluster and I'm ready to ride a little more comfortably.Jul 03, 2011
|
|
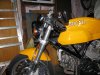
...after (hi-rise clip-ons).685 viewsJul 03, 2011
|
|
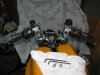
503 viewsHi-risers and controls installed, ready to put the bike back together.Jul 03, 2011
|
|
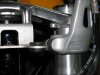
450 viewsThis shows the stock locating pin on the hi-riser. Because the banjo fittings on the hand controls interfered with the gauge cluster I couldn't use the stock positions -- bummer! So I removed the locating pins and rotated the clip-ons backward a couple millimeters. My clip-ons are butted up against the upper triple. I also had to adjust my left steering stop so my horn button wouldn't press against the tank so my left turning radius is slightly less than my right.Jul 03, 2011
|
|
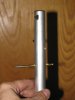
420 viewsThe end result of the drilling. Yes, the hole is perpendicular.Jul 03, 2011
|
|
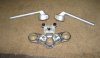
489 viewsJust a picture of the stock '06 clip-ons and the bottom side of the upper triple tree.Jul 03, 2011
|
|
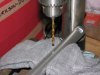
438 viewsIt seems that the locating pin on the '06 throttle clamp is 180-degrees off compared to later models. The fix was simple: Use a 5/32" drill bit and drill straight through the existing hole. Easy-peasy!Jul 03, 2011
|
|
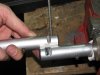
464 viewsThe top bar has the stock groove in it and the bottom one shows the extra material I had to remove, about 3/4 of the width of the original groove. Both bars required this modification. This allows the bar to be positioned "down" more so the reservoir clamps/brackets can fit on the bars. I used a hack saw to make the initial removal of material then used a rat-tail (round) file to further remove material and neaten the curves. Remember to remove just a little instead of too much! These are aluminum and it's very easy to work with.Jul 03, 2011
|
|
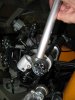
484 viewsOther side of the right bar showing another locating hole.Jul 03, 2011
|
|
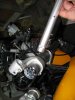
465 viewsRight side showing locating pin and hole.Jul 03, 2011
|
|
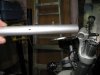
458 viewsOther side of the bar showing the locating pin and hole.Jul 03, 2011
|
|
530 viewsHi-riser is slipped on the fork tube and here is the bar in stock form.Jul 03, 2011
|
|

526 viewsUpper triple tree removed. Use a 6mm Allen wrench to loosen all clamping bolts. Alternately tap the bottom of the clip-ons to walk the triple tree and clip-ons up. I used a block of wood positioned under the clip-on and tapped it with a rubber mallet -- just in case I missed the wood!Jul 03, 2011
|
|

523 viewsDetail of the top triple tree with stock clip-ons.Jul 03, 2011
|
|
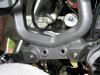
509 viewsDetail of the bottom of the unbolted ladder.Jul 03, 2011
|
|

507 viewsMy fingers are pointing to the two pins that fit into the two rubber grommets that are part of the upper triple tree (visible in the foreground).Jul 03, 2011
|
|
518 viewsIn order to remove the upper triple-tree the headlight needs to be removed and then the U-shaped ladder part that the headlight attaches to is then removed. Remove the two nuts at the bottom of the ladder then lift it up. Also, disconnect the headlight connector and put the headlight out of the way.Jul 03, 2011
|
|
| 1529 files on 77 page(s) |
 |
18 | |
|





