 Last additions - Zoom-zoom Last additions - Zoom-zoom |
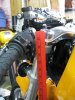
Before...467 viewsThe bottom of the switch housing is at 34".Jul 03, 2011
|
|
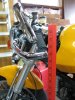
Before...522 viewsYard stick shows 32" at bar-end mirror mount.Jul 03, 2011
|
|
Before...448 viewsJul 03, 2011
|
|
Before...523 viewsJul 03, 2011
|
|

Before...530 viewsJul 03, 2011
|
|
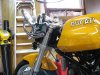
Before...618 viewsJul 03, 2011
|
|

Before (stock clip-ons)...667 viewsJul 03, 2011
|
|
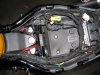
1929 viewsSpace is now available. I'll be using this to house my Dynojet PowerCommander III.Jun 01, 2011
|
|
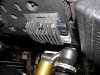
1644 viewsNow insert the right bolt in the R/R and tighten into the seat pan's captured nut. Remove the left bolt, apply Loc-tite (just like the other two fasteners) and tighten it to the bracket. Very snug but not so tight that you strip out the threads in the metal!Jun 01, 2011
|
|
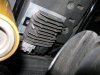
Mounted and wired!1795 viewsThis is how it looks when done.Jun 01, 2011
|
|
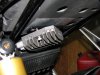
1706 viewsNext, loosely put in the left bolt. This will help keep the left R/R hole lined up.Jun 01, 2011
|
|
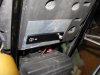
1702 viewsPosition the bracket with the right bolt, having the hole centered on it. Tighten the counter-sunk bolt (left side) into the bracket and seat pan's captured nut. Remove the bolt from the right side.Jun 01, 2011
|
|
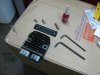
1813 viewsThe MOSFET R/R, painted bracket, and stainless-steel fasteners. Blue Loc-tite is necessary on all three fasteners. The counter-sink bolt uses a 4mm Allen while the two cap bolts use a 5mm Allen wrench.Jun 01, 2011
|
|
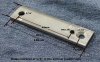
Added: Everything you need to know to mount a MOSFET R/R!2072 viewsHere's the bracket I made from some scrap steel I had. It's 3/16" (5mm) thick. If you use a different thickness just make sure the piece used is thick enough to hold 4 threads at a MINIMUM! You want plenty of fastener thread engagement for the M6x1.00mm tap as that is where one side of the MOSFET R/R will be mounted. The chamfered hole is made with a 17/64" bit and then widened via chamfering. NOTE: Prior to this I had my MOSFET R/R mounted in the stock location with just one bolt and had NO ISSUES with it coming loose/moving.Jun 01, 2011
|
|

765 viewsClose-up of the front view installation. Nice and neat, eh?May 14, 2011
|
|
776 viewsFinished view from the left side.May 14, 2011
|
|
623 viewsBreather line re-installed and bracket re-mounted with both oil lines now inside. Now connect the line to the top of the oil cooler and tighten the bottom connection. The connections are snugged to 24 ft-lbs -- that's not very tight so go easy! Again, use both 19mm wrenches to tighten things. Also, smear engine oil on the O-rings before slipping them into the connector. Make sure the insertion is straight and smooth as you do NOT want to tear or pinch them!May 14, 2011
|
|
633 viewsSlide the bracket back down (shown here where it comes from), pop the breather back in the loop, then bolt the bracket back onto the engine.May 14, 2011
|
|
625 viewsHere's both oil lines in the bracket.May 14, 2011
|
|
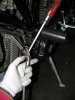
677 viewsWith patience and a little wiggling, use the screwdriver to help coax the coupling nut into the bracket.May 14, 2011
|
|
| 1529 files on 77 page(s) |
 |
19 | |
|





