 Last additions - Zoom-zoom Last additions - Zoom-zoom |
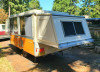
278 viewsAug 15, 2021
|
|
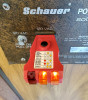
298 viewsShore power works and wired correctly.Aug 15, 2021
|
|
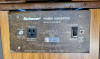
273 viewsAug 15, 2021
|
|
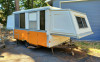
278 viewsAug 15, 2021
|
|
322 viewsAug 15, 2021
|
|

305 viewsAug 15, 2021
|
|
293 views4-prong flat connector for external travel lighting, brakes, & turn signals.Aug 15, 2021
|
|
262 viewsHitched up and ready to go!Aug 15, 2021
|
|
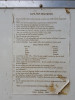
270 viewsJust some FYI.Aug 15, 2021
|
|

289 viewsComes with spare tire mount.Aug 15, 2021
|
|
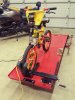
696 viewsWill even work for my son's bicycle :-)Jun 17, 2017
|
|
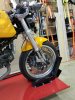
1283 viewsHere is my Sport Classic in the new Derek Weaver vise.
I kept the original wheel stop because it is in a stronger mounting location. Using the supplied DW wheel stop would require mounting it on the vertical strip just under the lift bed. That is welded on and could possibly bend if struck too hard when rolling the bike against it. It would also require drilling two more holes...meh, why bother?
https://www.derekweaver.com/bikers-garage/motorcycle-lift-parts-accessories/w-vise-motorcycle-vise-tire-clamp/
Jun 17, 2017
|
|

Mounting measurements677 viewsAll measurements are from the inside boundaries. Final measurements may slightly differ (~1/8") after bolts are tightened. This won't affect operation.
Drilling requires a 1/2" drill bit for metal. All of the holes in the vise parts are on the large side so there is a little bit of room for small tweaks in mounting positioning.
Jun 17, 2017
|
|
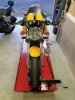
688 viewsSport bike clamped in without straps.Jun 17, 2017
|
|
690 viewsJun 17, 2017
|
|
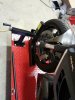
682 viewsJun 17, 2017
|
|
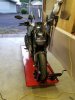
711 viewsMy Diavel Strada (cruiser-ish) clamped in without straps.Jun 17, 2017
|
|
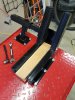
734 viewsDue to some minor slop in vise, gently press an object in the vise (I used a 2x4) and then tighten the bolts in a star pattern.
While the clamp could be mounted the other direction it would likely interfere with a bike that has deep fenders. Also, the clamp would need to be opened more to allow the axle, calipers, and axle sliders past.Jun 17, 2017
|
|
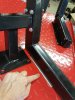
739 viewsI placed a thin ruler under the clamp that moves and then bolted the screwing mechanism to it. This gave the bottom of the clamp a tiny bit clearance to better move over the surface of the lift. Yeah, I'm being anal and it's probably not necessary.Jun 17, 2017
|
|
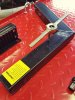
671 viewsI chased the clamp bolt holes with a tap to expose the bare metal. I opted to not use the supplied lock washers because I don't like the idea of them digging into the paint and exposing the metal to air and moisture (rust). So ALL fasteners have blue Loctite on them to hold them in place. I used a flat washer under every bolt head and under every nut.Jun 17, 2017
|
|
| 1529 files on 77 page(s) |
2 |  |
|
|





