 Last additions - Zoom-zoom Last additions - Zoom-zoom |
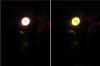
Night-time, parking lamp only441 viewsComparison of the two bulbs in the dark. On the left is the standard incandescent and on the right is the LED unit.Feb 23, 2011
|
|

Day-time, parking lamp only532 viewsComparison of the two bulbs. On the left is the standard incandescent and on the right is the LED unit.Feb 23, 2011
|
|

450 viewsThis shows where the retaining clip will rest. Simply put the top of the headlamp ring on the lip of the headlamp bucket and pivot the bottom section down. Make sure the retaining clip fits inside the bottom of the headlamp bucket and then gently push the bottom of the headlamp towards the bike body. Snug retaining screw to secure headlamp but don't over-tighten!Feb 23, 2011
|
|

448 viewsThough you can watch the video here, it's awfully big so I suggest going to my YouTube page here: http://www.youtube.com/watch?v=ozZp4sLwWhAFeb 23, 2011
|
|
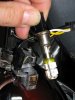
459 viewsHere's the LED replacement, ready for use.Feb 23, 2011
|
|
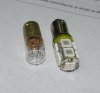
463 viewsClose-up comparison of the incandescent bulb (left) and the LED replacement (right).Feb 23, 2011
|
|

450 viewsThe stock incandescent bulb. Boooo!Feb 23, 2011
|
|
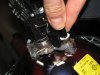
459 viewsThe parking lamp simply pulls straight out. It's a friction-fit retention assembly.Feb 23, 2011
|
|
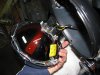
464 viewsThe headlamp exposed. Pretty darn simple in there.Feb 23, 2011
|
|
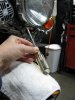
493 viewsUse a Phillips screwdriver to remove the retaining screw at the bottom of the headlamp. No need to completely remove the screw, just until it becomes loose & wobbly.Feb 23, 2011
|
|
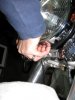
Fingernails help here.462 viewsPut your fingers between the headlamp bucket and the chrome headlamp ring and pull the bottom of the headlamp out. It only needs to travel a centimeter or two for it to be free. Unhook the top and carefully lay the headlamp on the fluffy towel you placed on the fender (that's a hint).Feb 23, 2011
|
|

414 viewsFeb 19, 2011
|
|
406 viewsFeb 19, 2011
|
|

447 viewsRight side, back view.Feb 19, 2011
|
|

427 viewsDamn she's a fine looking ride! Protectors mounted.Feb 19, 2011
|
|
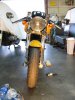
404 viewsThis shows my bike with one protector on. The left side of the picture (right side of bike) is no protector while the right side of the picture (left side of bike) has the fork protector mounted.Feb 19, 2011
|
|
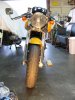
373 viewsBoth protectors mounted.Feb 19, 2011
|
|

400 viewsShowing the gap between the protector and the monoposto fender.Feb 19, 2011
|
|
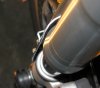
393 viewsShowing the gap between the protector and the upper fork. Since the wheel assembly moves up and down a gap is needed so the protector won't scrape against the fork.Feb 19, 2011
|
|
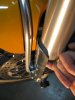
408 viewsFeb 19, 2011
|
|
| 1529 files on 77 page(s) |
 |
21 | |
|





