 Last additions - Zoom-zoom Last additions - Zoom-zoom |
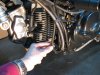
448 viewsThis is the drainage hose that I'm removing. I'm just going to tee it into the existing bleed hose, that's all.Dec 18, 2010
|
|
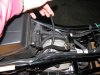
459 viewsI'm holding the hose that I'm going to merge and thus remove. The one near the bottom of the picture with the brass hose clamp is the hose that will remain and thus serve as the bleed and drainage line.Dec 18, 2010
|
|
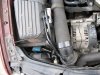
9752 viewsRight [passenger] side ballast/ignitor affixed to airbox top.Dec 05, 2010
|
|
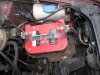
10820 viewsRelay zip-tied to hose clamp on left [driver] side. Ballast/ignitor is under the light housing, on the longitudinal bumper frame(?), sitting on a pad.Dec 05, 2010
|
|
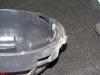
8727 viewsThe end result. Removed material should almost be flush with the rubber sealing ring. It's okay and recommended to have it a bit higher than the sealing ring, say, .5mm to 1mm.Dec 04, 2010
|
|
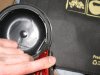
7743 viewsUse sharp blade to cut away the plastic and bevel the lip (remove sharp edges).Dec 04, 2010
|
|
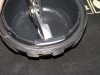
6733 viewsUse pliers to gently pull the section back. Start from one end and work your way to the other end. Dec 04, 2010
|
|
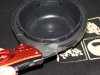
5781 viewsUse a sharp blade to score the plastic. This will allow the plastic to break away easily.Dec 04, 2010
|
|
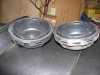
34858 viewsThe left cover has been modified; the right has not. The covers are not "sided", they are the same so you don't have to worry about mixing them up. Modify them both the exact same way.Dec 04, 2010
|
|
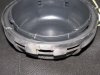
4781 viewsCut out the plastic lip from the covers. This allows the cover to be placed back on and turned, helping to keep water and dust out of the light housing.Dec 04, 2010
|
|
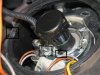
14958 viewsThe far left box shows plastic removed for the HID wires and the 3-prong plug that normally goes on the halogen bulb. Make the left [driver] side slightly bigger to accommodate all wires. Should be snug! Center box shows how bulb retaining hook is moved to under the frame and the far right box shows how the retaining wire is positioned to hold the HID bulb in. It will require a slight bending of the wire but not too much because you don't want to break the spring steel!! Dec 04, 2010
|
|
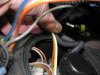
24903 viewsHere's the wiring pushed down in the slot and ready for the cover to be placed on. Note that on the right [passenger] side there was no need for the bulb plug so I left it inside the light housing and made the wire pass-through notch big enough for just the HID wiring.Dec 04, 2010
|
|
445 viewsNov 20, 2010
|
|

471 viewsNov 20, 2010
|
|
463 viewsNov 20, 2010
|
|
456 viewsNov 20, 2010
|
|
462 viewsNov 20, 2010
|
|

496 viewsThe "OUT" port is on the right side of the tank and this is where the fuel is outputted to the fuel injectors. The "IN" port is where the fuel is pushed back into the tank/pump. At the end of the IN port, inside the tank, is the pressure regulator. Nov 20, 2010
|
|
514 viewsNov 20, 2010
|
|
507 viewsNov 20, 2010
|
|
| 1529 files on 77 page(s) |
 |
24 | |
|





