 Last additions - Zoom-zoom Last additions - Zoom-zoom |
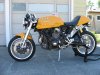
890 viewsSep 11, 2010
|
|
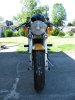
744 viewsSep 11, 2010
|
|
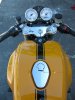
821 viewsSep 11, 2010
|
|
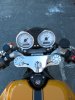
890 viewsRider's perspective. Notice that you can see the front of the gauge cups.Sep 11, 2010
|
|
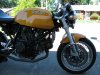
Before...1068 viewsStock gauge position.Sep 11, 2010
|
|
2483 viewsVideo showing how to lift the seat pan and pass the R/R through.
See this video on YouTube.com for faster viewing --> http://www.youtube.com/watch?v=vkBDNjCG7-wMay 04, 2010
|
|
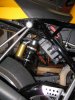
2375 viewsYou can see in this picture that the R/R wiring is protected. Even the R/R is forward of center from the tire so it won't get too abused.May 04, 2010
|
|
2163 viewsMay 04, 2010
|
|
2300 viewsMay 04, 2010
|
|
2344 viewsMay 04, 2010
|
|
2303 viewsHere it is, mounted and ready for action.May 04, 2010
|
|
2407 viewsI recommend bolting the seat pan in place before mounting the R/R. It just makes installation much, much easier. As can be seen, the R/R cabling passes through the gap between the forward seat pan clips. You can also clip the seat release cable back in. Don't forget to test fit your Irish Whiskey flask! Very important.May 04, 2010
|
|
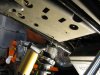
2278 viewsHere's the underside of the seat pan after I drilled through with the 3/16" drill bit. the 3/16" bit fits perfectly in the hole and doesn't touch the threads. You want to drill all the way through the pan!May 04, 2010
|
|
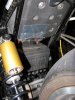
2540 viewsThis part is optional but here's what I did. I had some aluminum, butyl-backed tape that's water-proof. I lightly traced the outline of the R/R and cut the tape to slightly larger than the outline. The tape I had is just shy of 2". I used two pieces of the tape, each 4.5" long. I also cleaned the underside of the seat pan with household rubbing alcohol to insure a strong bond.May 04, 2010
|
|

2379 viewsTo mount the R/R, I used two 6mm x 1.00 x 25mm stainless steel cap head bolts. Between the R/R and seat pan are two stainless steel washers (same size as the bolts). These act as a spacer to put an air gap between the R/R and the seat pan. Remember, we want air flow all around the R/R so don't mount it flush to the seat pan!
I do NOT recommend using the stock bolts! I used stainless steel since the fasteners will be exposed to the elements and we don't want to deal with rust later on. The bolts are also 5mm longer and this allows more of the bolt to thread into the brass nuts. I also used blue thread locker.May 04, 2010
|
|
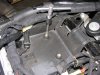
2218 viewsNext, use a 6mm x 1.00 tap to thread the brass and plastic that you drilled through.May 04, 2010
|
|
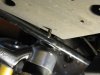
2343 viewsMake sure you tap all the way through the hole. You will get a fair amount of brass flakes so be sure to vacuum your mess up! In hindsight, I'd recommend covering your tire and chain guard with a large rag.May 04, 2010
|
|
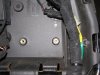
2895 viewsHere you can see the drilled holes. The left one is after drilling with the larger bit. The right hole is just after I drilled with the pilot bit. I have a light below the seat pan.May 04, 2010
|
|
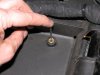
2383 viewsI used a 3/32" drill bit to make a pilot hole in the captured brass nut. The bottom of the nut is funnel-shaped so the bit will automatically drop to the center.May 04, 2010
|
|
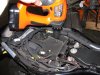
2239 viewsGently and at medium speed, drill a hole through the center. All the way through. You don't need a big drill either, the brass and plastic will drill easily. Go on...do it!May 04, 2010
|
|
| 1529 files on 77 page(s) |
 |
27 | |
|





