 Last additions - Zoom-zoom Last additions - Zoom-zoom |
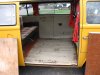
403 viewsAll wood removed, exposing the bare Bus floor. Thank goodness rust was very, very minimal!Feb 06, 2010
|
|
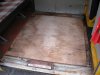
406 viewsClose-up of the pieces of plywood.Feb 06, 2010
|
|
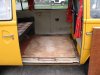
412 viewsSheet of plywood with carpet glued to it removed. Exposed are additional plywood pieces that everything is screwed into. Note that these pieces of plywood are screwed to the Bus floor. I really don't think it's necessary but luckily only a couple screws were used.Feb 06, 2010
|
|
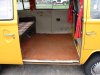
418 viewsThe floor. Slider door edge trim removed, folding table removed, forward carpet trim screws removed, and the cut made along the forward edge of the rear seat.Feb 06, 2010
|
|

400 viewsQuick video of how to place the mounting hardware.Feb 06, 2010
|
|
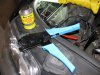
The install453 viewsLiquid electrical tape used to fill in and insulate crimps. High-quality ratcheting crimpers make the difference!Feb 06, 2010
|
|
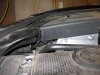
407 viewsThe cover back in place with room to spare. Keeps the engine bay looking tidy.Feb 06, 2010
|
|
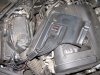
401 viewsI used the supplied double-sided tape to mount the electronics under the cosmetic cover. If you do this make sure you clean the mounting surfaces with rubbing (isopropyl) alcohol.Feb 06, 2010
|
|
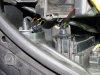
387 viewsThe hard cover in place with the gasket. I can't tell you how many hours I spent trying to get this all to work with such limited space...grrr...Feb 06, 2010
|
|
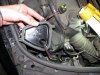
496 viewsCable passed through hole, ready for the gasket.Feb 06, 2010
|
|
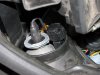
378 viewsClose-up of the connectors tucked away, ready for the rubber boot to cover them.Feb 06, 2010
|
|
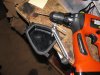
400 viewsDrill a small pilot hole first then...Feb 06, 2010
|
|
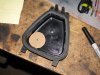
Through the hard cover425 viewsJust an FYI: I do NOT recommend this method! PITA if you have any issues. Go through the rubber cover.
Make a template that is 7/8" in diameter and trace with a permanent marker. Or put a nail or screw into the center of the circle and tap it so it leaves a dimple -- that's where you will drill. I used this location because it gave me the most slack in the wiring. The shop that does this recommended not putting the gasket in the center of the hard cover because there wouldn't be enough wiring slack.Feb 06, 2010
|
|
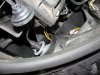
Right side417 viewsThis is the side I started on and passed the harness through the hard cover as recommended by a shop that does the procedure. What a MAJOR pain in the butt! Ideally, it would be best to REMOVE the airbox in order to get enough space to maneuver around; a much bigger task than I cared to do after 3 hours of work involved already! I have long thin fingers and trying to get the bulb in the socket, as well as the gasket into the hard cover, was quite difficult. Anyone with thicker and/or shorter fingers would likely have an even more difficult time as the space is just too cramped around that area.Feb 06, 2010
|
|
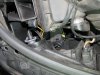
395 viewsHow it looks with the plug in place and the gasket ready for the hard cover.Feb 06, 2010
|
|
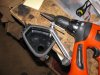
395 views...use a hole saw or reamer to enlarge to 7/8" diameter. This is where the gasket will mount and allow the wires to pass through.Feb 06, 2010
|
|
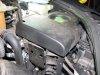
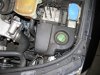
409 viewsThe decorative cover fits nicely over the unit, hiding it from view.Feb 06, 2010
|
|
409 viewsFeb 06, 2010
|
|
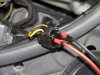
424 viewsThe bulb I originally had for the left side was bad so I got a replacement. This had the wires through it but no connector. Overall, it is better as there was no need for me to cut the wires, push them through the gasket, and butt-crimp them. For the connection, I pushed the spade connectors into the stock connector, dabbed liquid electrical "tape" around it to electrically insulate it as well as help hold the connectors, then wrapped the connector in electrical tape to further hold the connectors in. Not ideal at all but it works.Feb 06, 2010
|
|
391 viewsFeb 06, 2010
|
|
| 1529 files on 77 page(s) |
 |
32 | |
|





