 Last additions - Zoom-zoom Last additions - Zoom-zoom |

567 viewsThe 3-pin connector apart. Next up is the 2-pin connector. After that the headlight can come completely off the bike. This is done by pushing the assembly up in the same direction as the fork tubes until the bracket comes off the upper pegs. Pull it forward a little to clear the pegs then downward (if a Strada windshield is in the way) and forward to clear the bike.Mar 15, 2014
|
|

613 viewsFirst, remove the two acorn nuts from the bottom of the headlight fairing. The order is nut, washer, fairing mount, then star-washer. Strada owners should remove the windscreen for easier access to everything. Next, snip the zip-tie on the left side that holds the two cables that feed the headlight. The cable holder is on the frame head. The two headlight cables are below it and towards the center rear of the frame head. That yellowish connector you see below the snips is one of them.Mar 15, 2014
|
|

541 viewsComes with everything you see here, including a knife for trimming excess film off and a very nice water mister. Follow the instructions! I did use the sharp knife to trim the mounting tabs off (they're only used for positioning the film). I placed the film closest to the inside edge of the lens (near the center of the headlight) to get the best coverage.Mar 15, 2014
|
|

526 viewsHow the product comes packaged after you pull it out of the box. Very nice!Mar 15, 2014
|
|
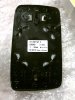
421 viewsThis is the back side (duh) of the HEATED, WIDE-ANGLE mirror for the left side-view mirror. This fits the North American vehicles perfectly! Remember to push the electrical connectors on/off several times so they make metal-to-metal contact and coat with a dielectric grease to slow corrosion.Aug 13, 2013
|
|
418 viewsMeh. Fuzzy picture of the mirror out and the plastic (nylon?) upholstery pry bar tool I used to remove the mirror. Came in a $5 kit from Harbor Freight. Since the mirror was cracked I could've used a steel clawed hammer to remove it.Aug 13, 2013
|
|
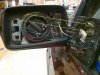
425 viewsTo replace the mirror, the guide pins (red) insert into the guide holes. The spring clips (blue) go into their respective cavities. They don't clip to anything. The tabs (yellow) on either side of the guide pins are what clip to the circular motor assembly in the mirror housing. I gently pushed the mirror in at the 1 o'clock position and pushed the rest of it in slowly in a clock-wise motion, listening/feeling each clip (yellow) catch the ring. Use leather gloves when installing so if it breaks you don't get cut. It takes firm, evenly distributed pressure to seat the mirror.Aug 13, 2013
|
|
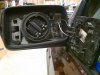
437 viewsWhat the interior looks like. I set the mirror so it was centered in the housing. I started at the 11 o'clock position and worked my way anti-clockwise (aka counter-clockwise), gently prying the mirror clips away from the ring mount.Aug 13, 2013
|
|
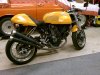
482 viewsAnd with mia ragazza herself.Aug 05, 2013
|
|
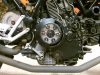
498 viewsMounted and behind my Rizoma vented clutch cover.Aug 05, 2013
|
|
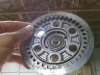
456 viewsSame thing, just a view from the back side.Aug 05, 2013
|
|
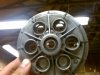
461 viewsOutside of OEM pressure plate, looking at the spring perches. See the light coming through? All but one of them had worn through.Aug 05, 2013
|
|
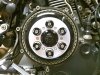
456 viewsVented EVR pressure plate mounted and springs/spring caps installed. In a star pattern, screw the bolts all the way down until they stop, THEN you continue the star pattern to torque them down. I placed the EVR logo at about the 4 o'clock position and then torqued the bolts, allowing the cap to rotate and thus line up neatly. It did take several tries.Aug 05, 2013
|
|
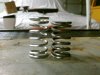
443 viewsHeight difference between the new stainless steel spring on the left and the tired steel OEM spring on the right.Aug 05, 2013
|
|
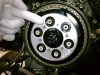
465 views...to mate with the notch in the one clutch spring post. I seriously don't think it matters but I tried to follow the workshop manual instructions as closely as I could, just in case.Aug 05, 2013
|
|
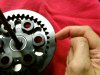
463 viewsI used the hole in the pressure plate...Aug 05, 2013
|
|
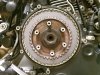
455 viewsClutch pack in!Aug 05, 2013
|
|
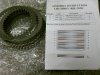
488 viewsThe new clutch pack and stacking instructions. No idea what the bottom image is for, I just used the top part.Aug 05, 2013
|
|
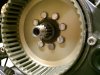
445 viewsNow remove the 4 bolts, apply thread locker, and install the 8 bolts according to the workshop manual. The local Ducati dealership said it would be perfectly fine to reuse the bolts. I had to hold the clutch basket and torque down the bolts...it was NOT easy! I had no tool to hold it. Next time I'll get a tool or hold the basket and have someone else torque the bolts. I originally removed the bolts with my air gun so there was no need to hold the OEM basket.Aug 05, 2013
|
|
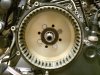
487 viewsNew basket placed within. Use 4 bolts, snugged in a star pattern, to seat the basket onto the hub.Aug 05, 2013
|
|
| 1529 files on 77 page(s) |
 |
9 | |
|





