 Most viewed - Diavel low-beam HID Most viewed - Diavel low-beam HID |
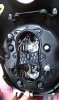
672 viewsRemove the headlight and place on a thick towel. The low-beam is at the top of the headlight, which is the top of this picture. This shows the back removed and the bulb area exposed -- there are 7 screws that hold the back on. The greyish-silver bolt at the 11 o'clock position on the outside edge is the headlight vertical adjustment. To get more operating space inside the housing I rotated mine anti-clockwise 6 turns. Make sure you mark the bolt with a spot on the housing so you know where to return it when everything is all installed.
|
|
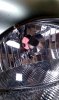
646 viewsLooking that the bulb reflector/cover from the front of the headlight. Use the eraser end of a pencil through the opening to GENTLY push the reflector forward -- towards the headlight glass -- so the HID bulb won't touch it. Every panel on the reflector is EASILY bent so take your time and GO SLOWLY! You want to push from the center of the reflector and just a couple millimeters. Test fit the HID bulb and gently wiggle it around, feeling that the tip doesn't touch the reflector.
|
|
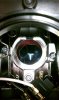
631 viewsLooking down into the bulb housing cavity. The reflector will need to be moved forward just a tad, like a couple millimeters, to clear the taller HID bulb. If you get flickering or the bulb doesn't light up after installing the HID bulb then chances are good that the bulb is touching the reflector and shorting out.
|
|
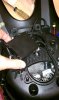
630 viewsThis is how you begin to stuff the electronics into the headlight bucket. Follow along...
|
|
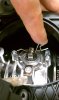
622 viewsPush the retaining clip down and then to the top of the light housing, then pivot it up and out of the way to the left side of the light housing.
|
|
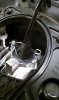
621 viewsHow the HID bulb looks when installed. It can only go in one way so it's pretty easy. Don't do it now as we need to get the electronics installed first!
|
|
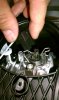
619 viewsThe bulb connector pulls straight off. Notice that it is one unit. The high-beam bulb has one connector on the bulb and a separate one on the bulb holder. The high-beam bulb is also smaller. Thus it's easy to determine which bulb is which. However, to give yourself some additional maneuvering room, you may want to disconnect the high-beam connectors and remove the high-beam bulb as well.
|
|
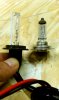
604 viewsHID on the left, OEM H7 on the right. Notice that the HID bulb is taller.
|
|
593 viewsBefore, low-beam. FYI: The ground in these before/after pictures is our asphalt driveway.
|
|
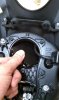
590 viewsNotice that the ballast (flat, squarish box) is going in first and the ignitor (long rectangular box) is still outside.
|
|
581 viewsAfter, low-beam.
|
|
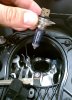
578 viewsRemove the puny OEM bulb. Carefully put it aside and don't touch the glass. You may want to save it as a spare, just in case.
|
|

574 viewsBefore, low-beam.
|
|
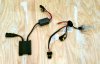
569 viewsThis is the complete kit. The flat, squarish box to the left is the ballast while the rectangular box above it is the ignitor. The bulb and wiring is to the right.
For removing the headlight see my album "Diavel headlight film install".
|
|
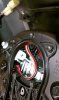
565 viewsI tucked the headlight connector into the middle left side of the headlight, below the white headlight adjustment mechanism. If you adjusted the headlight vertical adjustment earlier this is when you will want to return it back to its original position, rotating it clockwise.
|
|
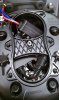
561 viewsI didn't get pictures of all the steps after this one because it's a bit fiddly. This shows roughly how you want to start the process of rotating the ballast anti-clockwise and move it a little left of center under that hourglass brace (center of headlight bucket). The electrical cables coming from the ballast will be pointing to the right side of the headlight bucket and the power plug will be up and next to the ignitor when done.
|
|
560 viewsBefore, high-beam.
|
|
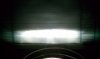
558 viewsAfter, low-beam.
|
|
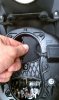
554 viewsRotating ballast clockwise to get it in there. The single electrical connector, or plug, goes down the right side of the headlight housing and then towards the high-beam bulb holder.
|
|
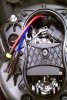
552 viewsThis is how it should look when done. The hard part of this install has been completed!
|
|
|
|




