 Most viewed Most viewed |
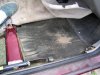
471 viewsFirst layer under right front carpet, foam padding like the rear but bonded to a protective rubber(?) sheet.
|
|
471 viewsThe start of a beautiful, Oregon day! Looking out the window of the delivery room.
|
|

471 viewsRonin's most favorite place at Grandma & Grampa's (Grandma Pat)
|
|

471 viewsAnd I put my bag in front of me and said, "Twik or tweet" and I got candy!
|
|
471 views
|
|
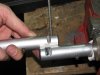
471 viewsThe top bar has the stock groove in it and the bottom one shows the extra material I had to remove, about 3/4 of the width of the original groove. Both bars required this modification. This allows the bar to be positioned "down" more so the reservoir clamps/brackets can fit on the bars. I used a hack saw to make the initial removal of material then used a rat-tail (round) file to further remove material and neaten the curves. Remember to remove just a little instead of too much! These are aluminum and it's very easy to work with.
|
|

470 viewsOur spooks.
|
|

470 viewsAnother view of the interference wear.
|
|

470 views
|
|

470 views
|
|

469 viewsSince there is no notch to hold the retaining bolt I welded on a tab. It keeps the bolt from rotating when removing/applying the retaining nut.
|
|

469 viewsRoni helping mommy load the dishwasher.
|
|
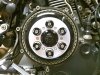
469 viewsVented EVR pressure plate mounted and springs/spring caps installed. In a star pattern, screw the bolts all the way down until they stop, THEN you continue the star pattern to torque them down. I placed the EVR logo at about the 4 o'clock position and then torqued the bolts, allowing the cap to rotate and thus line up neatly. It did take several tries.
|
|

468 viewsThe first time I've put up lights. Of course I didn't really have a decision in the matter...
|
|
468 viewsWatching the tree get decorated really pooped me out (Brittany).
|
|
468 views
|
|
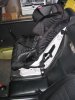
468 viewsCar seat anchored in with the shoulder belt and a seat belt locking clip.
|
|

468 views"Hey Dad, quit bogartin' the brew!"
|
|

468 viewsThe PCIII-USB and the extensions completed, ready for installation!
|
|
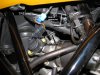
468 viewsLeft side of the engine showing the two connectors for the rear (vertical) cylinder injector. The YELLOW wires from the PCIII go here.
|
|
| 3332 files on 167 page(s) |
 |
42 | |
|





