 Most viewed |

467 views
|
|

467 viewsSplashing and talking.
|
|
467 viewsWith the window down our lovely model can just reach past the window channel.
|
|
467 views
|
|
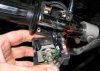
467 viewsWhen attaching the switch housing make sure to line up the housing pin to the hole in the handle bar.
|
|
Fingernails help here.467 viewsPut your fingers between the headlamp bucket and the chrome headlamp ring and pull the bottom of the headlamp out. It only needs to travel a centimeter or two for it to be free. Unhook the top and carefully lay the headlamp on the fluffy towel you placed on the fender (that's a hint).
|
|

467 viewsRight side of the engine showing the two connectors for the front (horizontal) cylinder injector. The ORANGE wires from the PCIII go here.
|
|
466 views
|
|
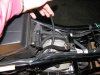
466 viewsI'm holding the hose that I'm going to merge and thus remove. The one near the bottom of the picture with the brass hose clamp is the hose that will remain and thus serve as the bleed and drainage line.
|
|
466 viewsLeft side. The front wheel stand and center body cradle can both be removed, as well as the gray twist-tie holding the bike down.
|
|
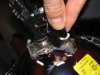
466 viewsThe parking lamp simply pulls straight out. It's a friction-fit retention assembly.
|
|
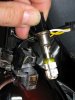
466 viewsHere's the LED replacement, ready for use.
|
|
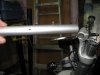
466 viewsOther side of the bar showing the locating pin and hole.
|
|

465 views
|
|

465 views
|
|
465 views
|
|

465 viewsC'mon Daddy, let's go let's go!!!
|
|

465 viewsHmmm...what did I get?
|
|

465 views
|
|
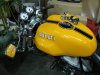
Mini Me465 viewsThe model on the actual.
|
|
| 3332 files on 167 page(s) |
 |
44 | |
|





