 Most viewed Most viewed |

448 views
|
|
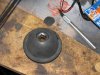
448 viewsTo hold the cover up while cutting, I used a 1/2" socket underneath. Use a very sharp Xacto blade and cut s-l-o-w-l-y and carefully.
|
|
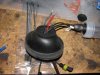
448 viewsHere's the rubber boot turned inside-out to get a better view of the inside of the gasket and the wires running through it.
|
|
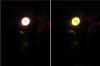
Night-time, parking lamp only448 viewsComparison of the two bulbs in the dark. On the left is the standard incandescent and on the right is the LED unit.
|
|
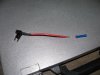
Fuse tap!448 viewsThis is how to easily and safely tap into some power without compromising the stock wiring or running a long lead through the firewall. I cut the bullet connector off so I could pass the wire through the grommet hole and so I could use one of my own spade connectors. To be on the safe side, make sure the fuse tap can handle 25A to 30A minimum. A 10A fuse tap won't work! The bottom slot is for the placing the stock fuse while the top is for the accessory and thus the red wire leading from the fuse tap.
|
|
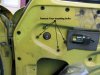
447 viewsRemove window crank, door handle release trim (escutcheon), door card (panel) and remove vapor barrier. Remove the four shown bolts with a 10mm wrench.
|
|

447 viewsFlange on lower heat exchanger.
|
|

447 viewsBella makes the car look BIG.
|
|

447 views...oh my, yes they did!
|
|

447 views
|
|

447 views
|
|

447 viewsHow the wire will be placed in the connector.
|
|

447 views
|
|
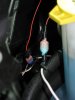
447 viewsThe red wire in the background is the turn signal tap while the white wire in the foreground is the feed to the DRL array.
|
|
446 views
|
|

446 views
|
|

446 views
|
|
446 views
|
|

446 views
|
|
446 views
|
|
| 3332 files on 167 page(s) |
 |
55 | |
|





