 Most viewed Most viewed |

425 views
|
|

424 views
|
|
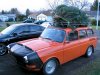
424 viewsMy trusty baby brought home the Christmas tree!
|
|

424 viewsPair of Ferrari 308.
|
|

424 viewsDino 246.
|
|

424 views21 Type 3's lined up and ready to hit the show! Yes, there were that many at the camp ground
:-)
|
|
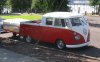
424 viewsSharp lookin' Bus. The nose is actually covered by a color-matched bra -- very nice!
|
|

424 viewsBetter picture of the cake and the birthday girl.
|
|

424 views
|
|

424 views
|
|
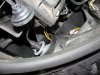
Right side424 viewsThis is the side I started on and passed the harness through the hard cover as recommended by a shop that does the procedure. What a MAJOR pain in the butt! Ideally, it would be best to REMOVE the airbox in order to get enough space to maneuver around; a much bigger task than I cared to do after 3 hours of work involved already! I have long thin fingers and trying to get the bulb in the socket, as well as the gasket into the hard cover, was quite difficult. Anyone with thicker and/or shorter fingers would likely have an even more difficult time as the space is just too cramped around that area.
|
|
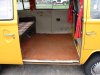
424 viewsThe floor. Slider door edge trim removed, folding table removed, forward carpet trim screws removed, and the cut made along the forward edge of the rear seat.
|
|

423 viewsA's favorite, most-lickable car.
|
|

423 views
|
|

423 views
|
|
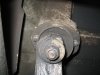
423 viewsLooking up at the transmission mount. Boy, looks like I'm gonna have to break out the Simple Green and scrub brush!
|
|
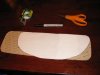
423 viewsPut the pattern on the back side of the StompGrip and trace the outline with a permanent pen. Then simply cut it with scissors. Following the instructions that come with the kit, make sure you have round corners.
|
|

423 viewsFollowing the supplied instructions, using a finger to hold the protector in place and keep it spaced between the upper fork and, in the case of the monoposto, the fender. Tighten the bolts.
|
|

423 views
|
|
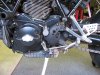
Close-up423 viewsStock cover.
|
|
| 3332 files on 167 page(s) |
 |
66 | |
|





