 Most viewed - Ducati Most viewed - Ducati |
Before...441 views
|
|

440 views
|
|
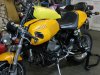
438 viewsHow it looks on the bike. Not as pretty as I had hoped but, man, does it work!
|
|

Night-time, parking lamp only438 viewsComparison of the two bulbs in the dark. On the left is the standard incandescent and on the right is the LED unit.
|
|

438 viewsHow the wire will be placed in the connector.
|
|
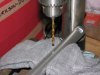
434 viewsIt seems that the locating pin on the '06 throttle clamp is 180-degrees off compared to later models. The fix was simple: Use a 5/32" drill bit and drill straight through the existing hole. Easy-peasy!
|
|

433 views
|
|

430 viewsRemove the two bolts that hold the fender bracket, using a 4mm Allen wrench.
|
|
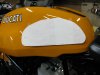
429 viewsCut the paper so you have a pattern. Tape it back to the tank, using the marks you placed earlier to property align it. Rub out the marks and put new ones down about 1/4" out. This will help when applying the StompGrip.
|
|

429 viewsWhat was available given the meager selection at the FLAPS which caters to the V8 and truck crowd. 500-ohms per foot is dang good when compared to what Accel wires had and the stock Ducati ones!
|
|

428 viewsI installed the new wire on the same path as the stock wire, just moved the zip-tie a little closer to the right so the wire wouldn't rub on the oil line fitting. I tried to position the wires from rubbing against any parts.
|
|

428 viewsJust a very slight bend in the plug wire.
|
|
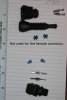
428 viewsThe connectors used to make a single pig-tail extension. These are known as AMP Junior Power Timer connectors (.250" or 250 connectors).
|
|
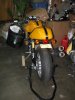
426 viewsNotes: The instructions say to clean the area with brake cleaner and scuff the area. Because I'm using the TankSlapper to protect my tank I didn't do either but I did clean the area on the TankSlapper well.
|
|

426 viewsHow the wire and core are positioned in the crimp.
|
|
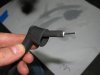
423 viewsThe 90-degree boot is on the wire and ready to be slid down. As per the instructions, just a spritz (very light coat) of WD-40 really helps move the boot down the wire.
|
|

422 viewsDamn she's a fine looking ride! Protectors mounted.
|
|

422 viewsPut the plug wire on the spark plug and figure out how long you need it. This was a short wire and I had half left over. Motorcycle spark plug wires tend to be shorter than your average V8.
|
|

420 viewsBottom of the display box.
|
|
420 viewsPrettier.
|
|
| 428 files on 22 page(s) |
 |
20 | |
|





