 Most viewed - Zoom-zoom Most viewed - Zoom-zoom |
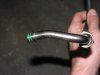
746 viewsThis is the end of the oil line that is connected to the output on the engine. Notice that goofy bend? That's what's needed for the line to clear the engine. The only tools needed are two 19mm open-ended wrenches, flat-bladed screwdriver, and a 5mm Allen wrench. Use one wrench to hold the connector nut and the other to remove/replace the oil line coupling nut.
|
|
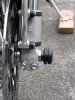
745 viewsLeft side does not fit in axle tube as the tube is a little smaller. It's small enough that it's really not noticeable to the unknowing eye. I know it doesn't fit exactly so, of course, I notice it.
|
|
741 views
|
|
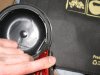
7741 viewsUse sharp blade to cut away the plastic and bevel the lip (remove sharp edges).
|
|
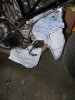
741 viewsRags in place to catch oil drippings and the Hypermotard line in position with the goofy bend end resting on the exhaust. Remove the top connection first. This way when you remove the bottom connection you can quickly move the stock line out of the way.
|
|
Right side740 views
|
|
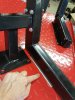
740 viewsI placed a thin ruler under the clamp that moves and then bolted the screwing mechanism to it. This gave the bottom of the clamp a tiny bit clearance to better move over the surface of the lift. Yeah, I'm being anal and it's probably not necessary.
|
|

738 viewsOnce the clutch slave is bolted down (10 ft-lbs) pre-fill with DOT-4 brake fluid. I used a syringe and found 6cc to be enough to reach the bottom of the threads. Next, remove the banjo fitting from the stock unit and put it on the new one, torquing it down to 23 ft-lbs.
|
|
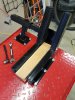
736 viewsDue to some minor slop in vise, gently press an object in the vise (I used a 2x4) and then tighten the bolts in a star pattern.
While the clamp could be mounted the other direction it would likely interfere with a bike that has deep fenders. Also, the clamp would need to be opened more to allow the axle, calipers, and axle sliders past.
|
|

735 viewsSafe and sound in her new home.
|
|

735 views
|
|
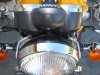
735 views
|
|
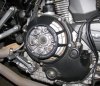
733 viewsClose-up. The body is metal, the clear cover is a thin plastic material (thin and flexible) and those four forward slots you see are openings.
The sound of the clutch is now quite audible! The stock clutch cover does a good job at keeping the clutch noise down. If you don't like the dry clutch "music" then keep the stock clutch cover on the bike.
|
|

733 viewsThe nice thing with the titanium "colored" Oberon is that its coloration is close to that of the stock unit and thus doesn't stand out.
|
|
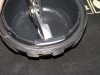
6732 viewsUse pliers to gently pull the section back. Start from one end and work your way to the other end.
|
|
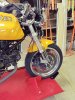
730 viewsHere is my Sport Classic (sport bike) in the original Harbor Freight clamp that comes with the lift.
|
|

Tail chopped728 views
|
|
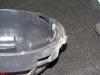
8727 viewsThe end result. Removed material should almost be flush with the rubber sealing ring. It's okay and recommended to have it a bit higher than the sealing ring, say, .5mm to 1mm.
|
|
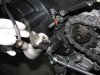
726 viewsThe stock clutch slave removed. Look at all that black crud! Give the area a good wipe down with a clean rag. Smear grease on the clutch push-rod if you wiped any off. I smeared white lithium grease on the mating surface of my Oberon, mimicking the stock application.
|
|

725 viewsRemove the sprocket cover, only two bolts attach it to the frame. All of the Allen head bolts being removed use the 5mm size. Next, use a 12mm wrench to break the banjo fitting free, then gently tighten it back a little bit to keep it from leaking. This will make it easier to remove it once the stock clutch slave is off the bike.
|
|
| 1529 files on 77 page(s) |
 |
11 | |
|





