 Most viewed - Zoom-zoom Most viewed - Zoom-zoom |
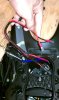
514 viewsConnect the wires to the power plug. Now all the ignitor and ballast wires are attached so you can push them further into and down inside the headlight bucket. Now you can loop in the other zip-tie to secure the ballast, cutting notches in the hourglass brace like I did if you want. If you removed the high-beam bulb you can now put it back in, along with its wires.
|
|
513 views
|
|
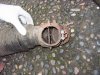
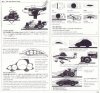
513 viewsHere is the flapper box that sits above the heat exchangers. This is the closed position so all air exits out the "bell" (right-most part of the flapper box) and into the atmosphere. Air is always flowing through the heat exchangers -- it just goes into the interior or vents to the outside.
|
|
513 viewsHere's what the left bracket looks like. Ugly. But it works, keeping it away from plastics and wires, so that's what matters in the end.
|
|
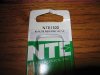
512 viewsHere's the VR (voltage regulator) information. This is what you need. I got mine for $3.15 at Norvac Electronics, Inc. You can also get it at Fry's. NTE1932, IC voltage regulator, positive 10-volts, 1-amp.
|
|

Done!512 views
|
|
511 views
|
|
...after.511 views
|
|
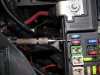
Connecting the DRL LED array.511 viewsI used a hand drill with a 2mm drill bit (smallest I had) to carefully drill a pilot hole into the side of the relay box. The pilot hole is 7mm down from the top of the lip of the fuse/relay box. It's between fuses M20 and M27.
|
|
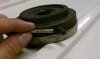
511 viewsI ground the planetary pin level and then drilled a 3/16" hole in it to a half-inch depth. I got a piece of 3/16" rod from the local hardware store, beveled the edge, then pushed it into the hole.
|
|
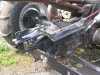
Cable shifter510 views
|
|
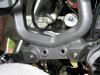
510 viewsDetail of the bottom of the unbolted ladder.
|
|

510 viewsNow the bar-end mount is up two inches at 34" high.
|
|
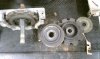
510 viewsLeft to right: Rear of gear box with rearward ring, laying on table is planetary ring, behind that is the forward ring, and behind that is a thin plastic washer.
|
|

509 viewsI used my engine hoist to lift my bike by the frame. I'm so glad I have this! This was necessary to get the full extension sag measurement as well as lifting the bike to take pressure off the lower bolt so it could be removed.
|
|
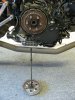
509 viewsUnscrew the bolts and remove the spring caps and springs. The pressure plate then pulls straight out and the push rod comes with it.
|
|
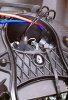
509 viewsFirst zip-tie installed. I waited on the second one so I could move the ballast a little while working on the electrical cabling. This just helps get the ballast out of the way and keeps it from moving around too much. You can now install the HID bulb and secure it.
|
|
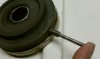
509 viewsThe new pin in the hole, ready for welding.
|
|
508 views
|
|
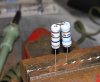
508 views...then soldered them together, trimmed off the extra wire, and carefully bent it back on itself.
|
|
| 1529 files on 77 page(s) |
 |
23 | |
|





