 Most viewed - Zoom-zoom Most viewed - Zoom-zoom |
1175 views
|
|
1173 views
|
|
1170 views
|
|
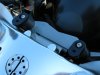
1169 viewsLowering brackets mounted to the bike.
|
|

1164 viewsMan I love the look of this helmet! Wind noise is greatly reduced compared to my noisy HJC. The helmet doesn't feel like it's pressing around the ears so I can hear my bike better. One thing that was noticeable was the air entering the face area. There are vents in the chin bar that are always open so this helmet will be nice in warmer weather...not so nice in cold weather unless I wear a face mask. Wearing my sunglasses was easy in my HJC but they don't fit quite as straight in the ROOF.
|
|

1161 viewsChin bar back, visor down. I noticed that the visor has a slight tint. The visor is NOT a quick-release type so those who do track days or carry a second visor (one for day, one for night) won't want this helmet. This is a road going helmet; if I decide to do track days I will have a helmet for that (likely Bell or Arai).
|
|
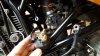
1159 viewsThe starter relay removed. You will need to disconnect the cables first in order to remove it.
|
|

1153 viewsSimple video showing the removal of the seat trim. 2.8Mb.
VERY SIMPLE proceedure and the Benley is helpful as well. See main section 7. This can be done in less than 5 minutes!
|
|
1152 views
|
|
1151 views
|
|
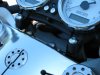
1149 viewsGauges mounted to the lowering brackets.
|
|
1147 views
|
|
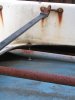
1143 viewsShowing how front luggage rack is held down. One in each corner.
|
|
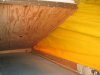
1140 viewsYup, ya gotta rip the bed up as part of the removal process. It's held down very well with long staples. Bed can be removed through the hole in the roof. So, after the Riviera is re-installed and screwed down, the bed bottom goes in last and is stapled down.
|
|
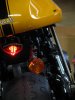
1138 viewsLED illuminated in parking light mode.
|
|
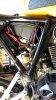
1138 viewsThis shows the end product. The brown line is the new Motolectric ground cable that pretty much follows the OEM path. The red line is the new Motolectric power cable for the starter circuit. I routed the new Motolectric cable along the OEM path along the upper frame.
|
|
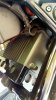
1136 viewsThe brown line is the OEM ground cable; it's connected to the negative terminal on the battery.
|
|
1133 viewsTunnel slider side of seat.
|
|
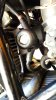
1133 viewsThe starter relay is back in place and the Motolectric cables attached. Notice that the relay output cable that goes to the starter is routed in the opposite direction. It now goes across the top of the horizontal cylinder to the left.
|
|

After...1130 viewsNow the gauge faces upward a little bit more thus allowing the rider (me) to view them better. A more direct, heads-on view.
|
|
| 1529 files on 77 page(s) |
 |
3 | |
|





