 Most viewed - Zoom-zoom Most viewed - Zoom-zoom |
456 views
|
|
455 viewsYes, the Scooby-Doo bobble head came with the camper :-)
|
|

455 viewsThese are the inner-most plates. Only slightly less wear than the fronts.
|
|

454 views8 cylinders backing up (6.55MB)
|
|

454 viewsC'mon Daddy, let's go let's go!!!
|
|
454 viewsAdd a new zip-tie to secure the headlight cables snugly, NOT TIGHTLY. Now the headlight can be mounted to the two lower anti-vibration mounts and the acorn nuts snugged. Done!
|
|

453 views
|
|

453 viewsWear on original starter. Plus it wouldn't start when it got hot (heat soaked) and even when cold it cranked a bit slowly.
|
|
The install453 viewsLiquid electrical tape used to fill in and insulate crimps. High-quality ratcheting crimpers make the difference!
|
|
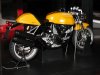
453 viewsThe rear suspension is twist-tied to the exhaust. Delicate procedure to remove it. I didn't see its purpose. The rear stand is 100% functional.
|
|
452 views
|
|
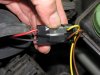
452 viewsThe plug wouldn't lock into the stock connector so I used a supplied zip-tie to bind it and electrical tape to keep it together. Notice that the RED wire mates with the YELLOW (+12 volts) bulb connector wire and the BLACK wire mates with the BROWN (ground) bulb connector wire.
|
|
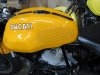
452 viewsHere's the StompGrip on the tank. The adhesive backing is 3M and it is sticky! So get everything lined up, triple checked, then peel the backing off. Place the StompGrip inbetween the marks and get it right the first time because the stuff is STICKY!
|
|
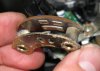
452 viewsThe female part of the sliding switch for the high/low beam switch. The long pad is the common power and the right pad is low beam, the left pad is high beam (as pictured here).
|
|
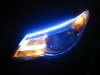
452 viewsOEM DRL on.
|
|
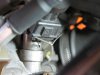
452 viewsOnce the bale is pulled out then the connector can be removed. As you can see, removing the bale doesn't need to be pretty to be effective.
|
|

451 viewsAntonette, at 5'8", next to the little vixen as a height reference.
|
|
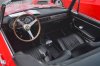
451 viewsHer interior.
|
|
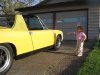
451 views"Daddy's Per-sha! Vroom! Vroom!" Bella is 34" in this picture (and petit by toddler standards).
|
|
451 viewsThe interior.
|
|
| 1529 files on 77 page(s) |
 |
33 | |
|





