 Most viewed - Zoom-zoom Most viewed - Zoom-zoom |

451 viewsThe stock incandescent bulb. Boooo!
|
|

451 viewsThough you can watch the video here, it's awfully big so I suggest going to my YouTube page here: http://www.youtube.com/watch?v=ozZp4sLwWhA
|
|

451 viewsThis shows where the retaining clip will rest. Simply put the top of the headlamp ring on the lip of the headlamp bucket and pivot the bottom section down. Make sure the retaining clip fits inside the bottom of the headlamp bucket and then gently push the bottom of the headlamp towards the bike body. Snug retaining screw to secure headlamp but don't over-tighten!
|
|
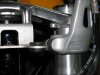
451 viewsThis shows the stock locating pin on the hi-riser. Because the banjo fittings on the hand controls interfered with the gauge cluster I couldn't use the stock positions -- bummer! So I removed the locating pins and rotated the clip-ons backward a couple millimeters. My clip-ons are butted up against the upper triple. I also had to adjust my left steering stop so my horn button wouldn't press against the tank so my left turning radius is slightly less than my right.
|
|
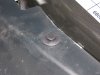
451 viewsPlastic pin used to hold the front fascia. Pry the head up...
|
|

451 viewsThere's a indentation in the seat pan that my tape measure consistently fit nicely in.
|
|

450 views
|
|

450 viewsSlipping the boot past the end of the wire can be a little tricky so hemostats are helpful in pulling. Remember to use some WD-40 to help lubricate the wire. The blue crimpers have an MSD die in them for crimping the connectors to the wires.
|
|
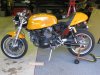
450 viewsStock sprocket cover.
|
|
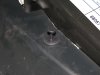
450 views...to release it from the split shaft below, making it easy to remove the entire pin assembly without breaking it.
|
|

449 viewsPop-top up, giving lots of standing room AND sleeping space!
|
|
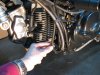
449 viewsThis is the drainage hose that I'm removing. I'm just going to tee it into the existing bleed hose, that's all.
|
|
Before...449 views
|
|

448 views
|
|
448 views
|
|
448 views
|
|
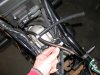
448 viewsHere's the hoses merged together. Cut the bleed hose about 6" down and insert the horizontal part of the tee. Connect the 8" hose. Done!
|
|

448 viewsRight side, back view.
|
|

448 viewsThe core is folded under the wire and the connector firmly crimped, ready for use.
|
|

448 viewsFacing into the sun, the LEDs can still be seen although they aren't as bright as dedicated OEM units found on other vehicles.
|
|
| 1529 files on 77 page(s) |
 |
34 | |
|





