 Most viewed - Zoom-zoom Most viewed - Zoom-zoom |
447 views
|
|
447 views
|
|
447 viewsFeed the harness through the rubber cup from the front side.
|
|
447 views
|
|

447 viewsHere's the high/low beam switch all buttoned up.
|
|

447 viewsI used the pick to pull back the OEM wire bale that holds the female connector to the injector. The small screwdriver is then used to keep the bale from snapping back while pulling the bale further out with the pick.
|
|
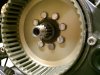
447 viewsNow remove the 4 bolts, apply thread locker, and install the 8 bolts according to the workshop manual. The local Ducati dealership said it would be perfectly fine to reuse the bolts. I had to hold the clutch basket and torque down the bolts...it was NOT easy! I had no tool to hold it. Next time I'll get a tool or hold the basket and have someone else torque the bolts. I originally removed the bolts with my air gun so there was no need to hold the OEM basket.
|
|
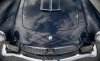
446 views'62 Maserati 3500 GTI
|
|
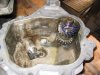
446 viewsThis shows the gear stack in the proper assembly order on the shaft in the tail cover. Note the notch in the spacer.
|
|
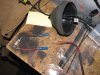
446 viewsFor the particular bulbs that came in this kit (an early version), I had to cut the wires and then feed them through the gasket. I used butt connectors and high-quality crimpers (expensive) to secure the wires.
|
|
446 viewsAnother view of the completed assembly. Notice that the bulb is on the inside of the rubber boot and that the bulb is still in the container. You don't want to expose the bulb until you absolutely have to, it must stay clean! You can use rubbing alcohol to wipe the bulb down if it gets dirty or you touch it -- oil from your skin is bad for the bulb!
|
|
446 views
|
|
445 viewsDucati engine.
|
|
Junior dragster445 views
|
|
445 views
|
|

445 viewsLeft heat exchanger accordion duct, looking forward. For some reason, the diameter was more than 16" so the wrap didn't fully cover it.
|
|

445 viewsShowing the left spark plug wire on the front (horizontal) cylinder. The Taylor kit came with dielectric grease which I smeared on the inside of both end boots. This helps keep moisture out and further insulates things.
|
|

All done!445 viewsLights on. I took this picture with the flash to dim the LED array as they are very bright.
|
|
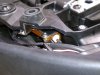
445 viewsThe left side mounted. The wiring of the pigtail and such was all pushed forward, thus being outside of the seat pan just like the resistor. The pigtail length was 15cm and that gave plenty of slack to add the resistor leads to.
|
|
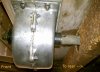
Reference shot445 viewsForward mounted gear box. On left side of trailer looking to the right side. Notice that I added a steel roll pin to the front of the gear box, just in case I need to crank from the front.
|
|
| 1529 files on 77 page(s) |
 |
35 | |
|





