 Most viewed - Zoom-zoom Most viewed - Zoom-zoom |

1129 views
|
|

1121 viewsRemove the stock bolts using a 5mm Allen wrench. Keep the stock bolts because you use them to remount the gauges to the lowering brackets.
|
|
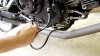
1117 viewsRemove the OEM cables. This is the cable from the starter relay to the starter. Mine was in really good condition for having over 16,000 miles on it. Even the starter post under the cable boot was clean!
|
|
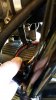
1115 viewsThe red line shows the new Motolectric cable is securely zip-tied to keep it from rubbing on the engine.
|
|

1115 viewsThe red line shows the Motolectric cable going down the left side of the engine and then under the horizontal cylinder.
|
|
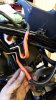
1111 viewsHere is the end result of my custom work. The copper tab is fairly easy to bend so I tweaked it just a tad to fit with the OEM tab.
|
|

1110 viewsI put a yard stick inbetween the gaps to show the distance of the tank to the ground. Just under 5" (five inches). That's pretty good space and if you get a leg stuck it could save that as well.
|
|
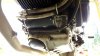
1110 viewsLooking under the engine from the front left side, shows the cable coming down from the left side and across the bottom of the engine to mount on the starter, 180-degrees from the OEM mounting.
|
|
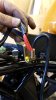
1108 viewsNow, the regular install guide for the SC has you "cap off" the OEM cable. I decided to get rid of the OEM cable so I removed it from the harness. Here is the insulation removed from the OEM battery mount. I cut the big, black starter cable about 1/2" from the crimp and then re-wrapped the whole thing with the supplied heat shrink. This gave me a completely separate starter cable from the other electrical wiring.
|
|
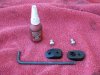
The necessary bits1104 viewsThe two black oval pieces are the lowering mounts. A 4mm Allen head wrench is for the shown M6 x 1.00 x 12mm stainless steel screws and, of course, thread locker.
|
|
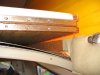
1098 viewsThe bed is held in by loooong staples. Simply puuuuuull up on it to rip it free. It's in there quite well!
|
|

1098 viewsThe brown line is the new Motolectric ground cable.
|
|

1086 views
|
|
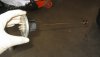
1080 viewsThe black float is at the top of the sender assembly.
|
|
1080 views
|
|
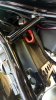
1073 viewsThe red line is the OEM cable that goes from the positive battery terminal to the top post on the starter relay.
|
|

1070 viewsVisor up.
|
|

1067 views
|
|

Before...1064 viewsStock gauge position.
|
|

Stock mountings1060 views
|
|
| 1529 files on 77 page(s) |
 |
4 | |
|





